Moving columns in Excel helps keep your data organized and easy to follow, just like reorganizing a drawer. This article will show you how to do it!
 |
Instructions on how to move a column in Excel effectively
To move a column in Excel, you can use the convenient drag and drop operation. This is the optimal way to rearrange your spreadsheet while keeping the data intact. However, be careful not to drag the wrong column. This method will help your data look neater and easier to follow.
To move a column in Excel, you can use the quick drag and drop operation:
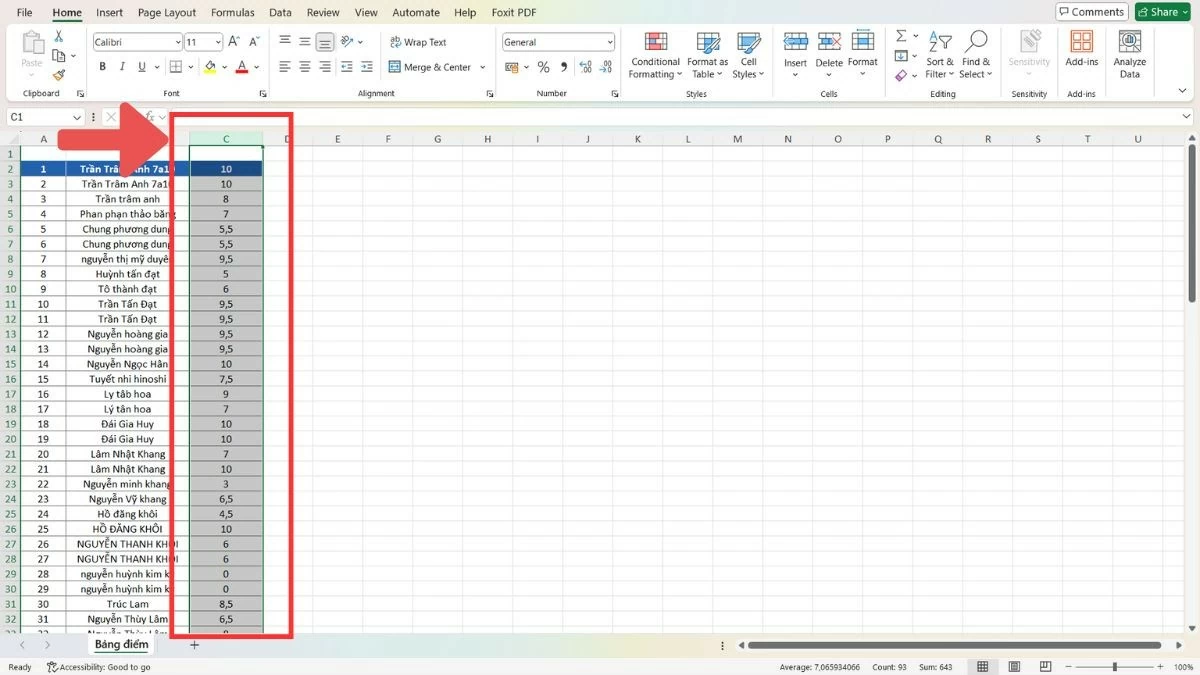
Step 1: Select a column by clicking on the first letter of the column (A, B, C...).
 |
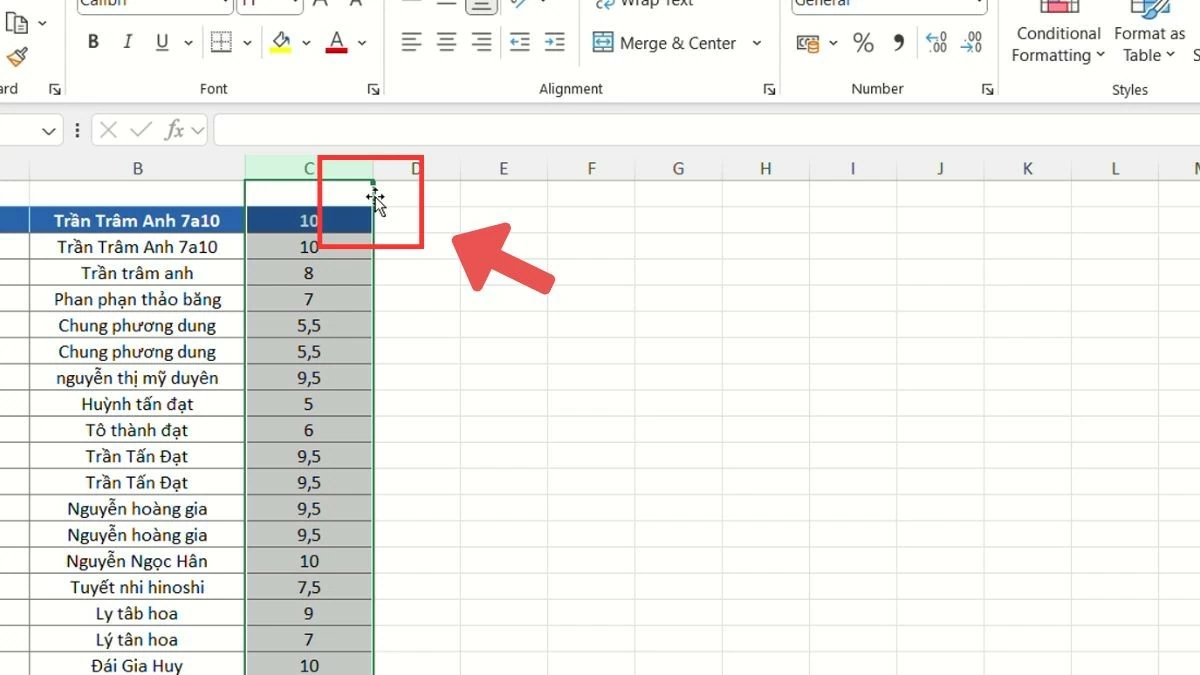
Step 2 : Move the mouse pointer to the border of the column and wait until the pointer changes to a four-way arrow.
 |
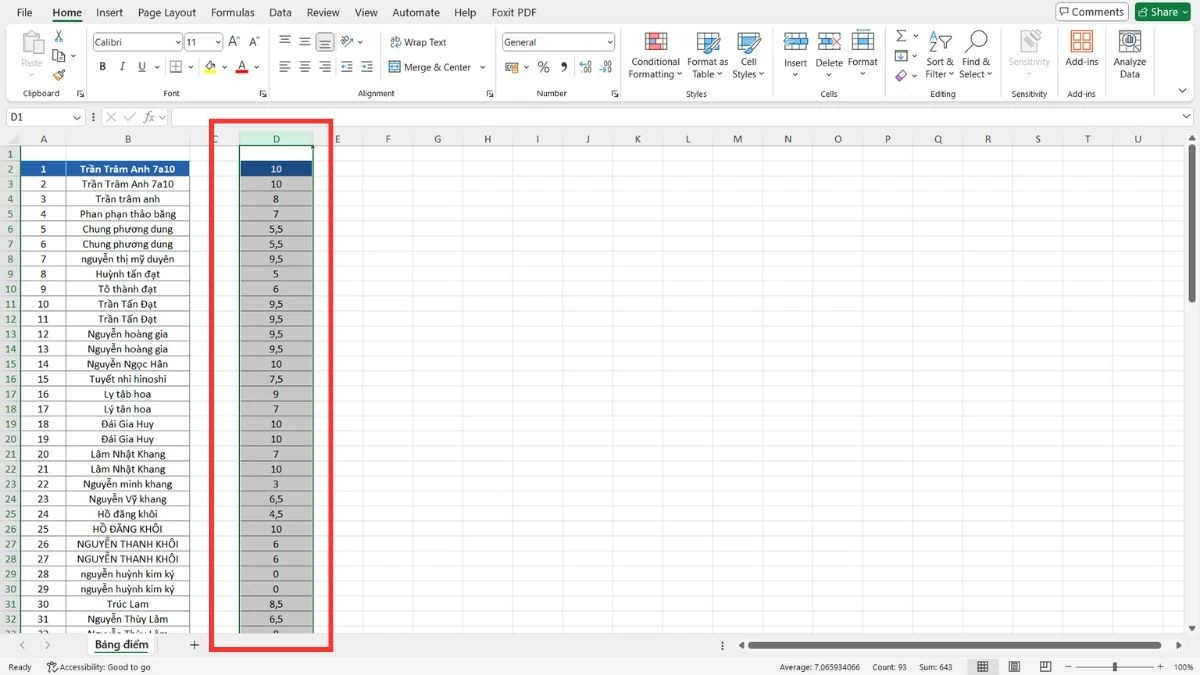
Step 3 : Drag the column to the new position and release the mouse.
 |
Alternatively, you can also use the “Cut” command to move columns:
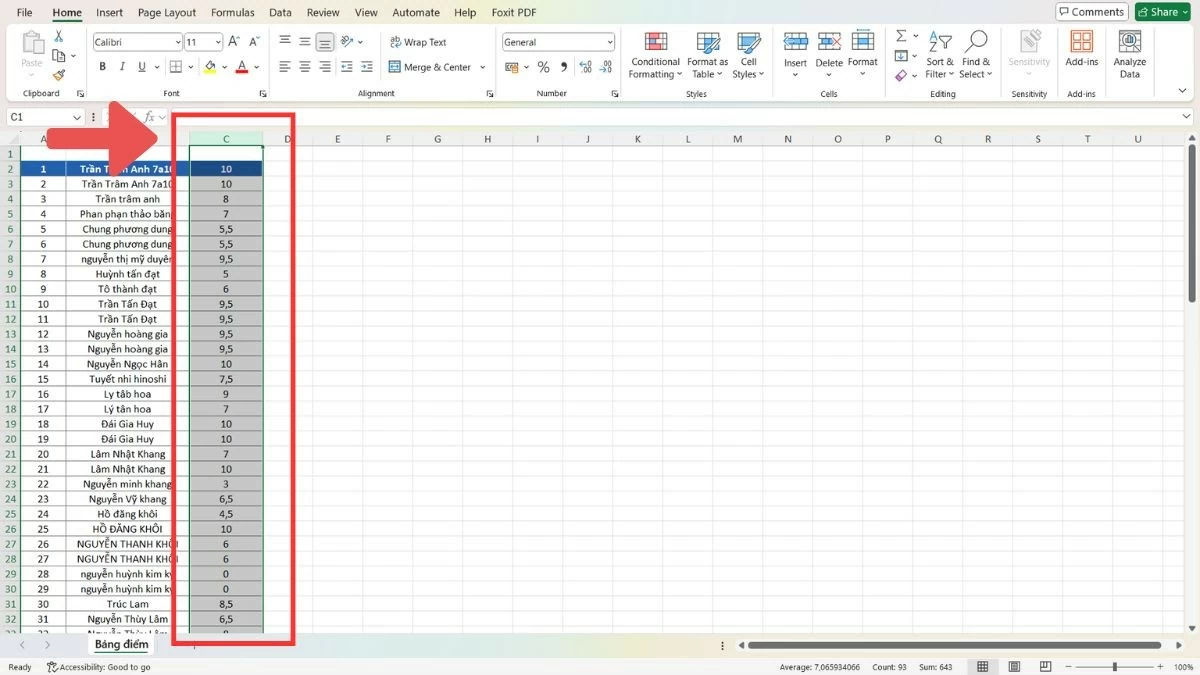
Step 1 : Select the column to move by clicking on the first letter of the column (A, B, C...).
 |
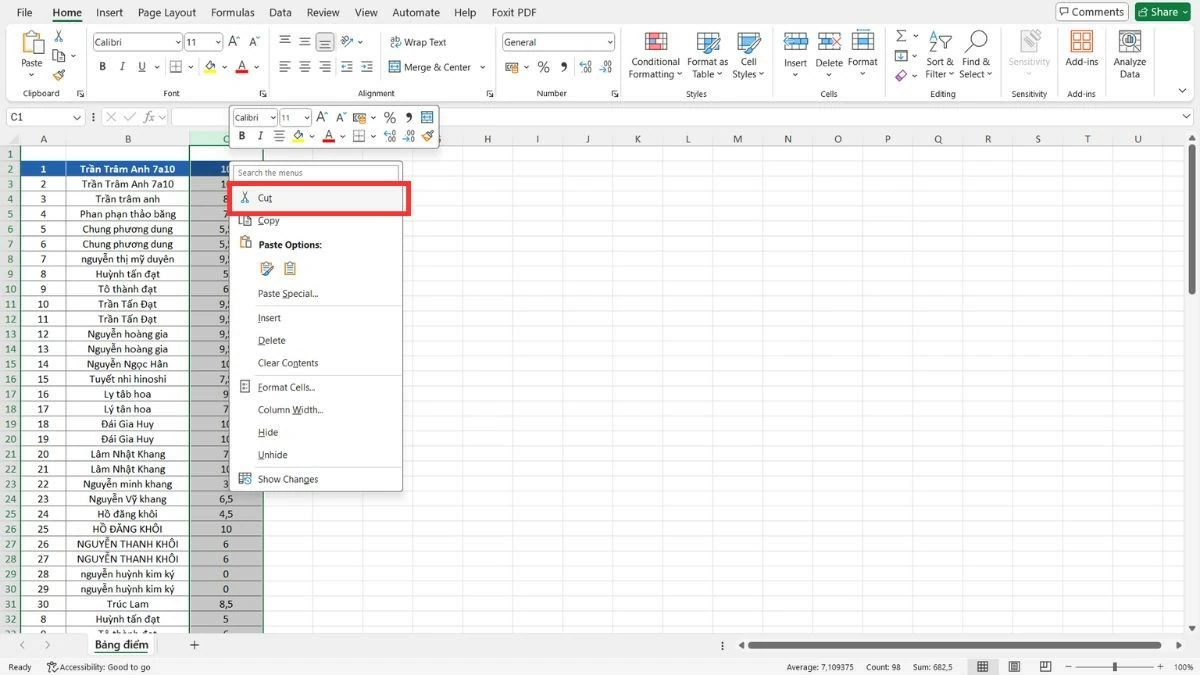
Step 2 : Press Ctrl+X or right-click and select "Cut".
 |
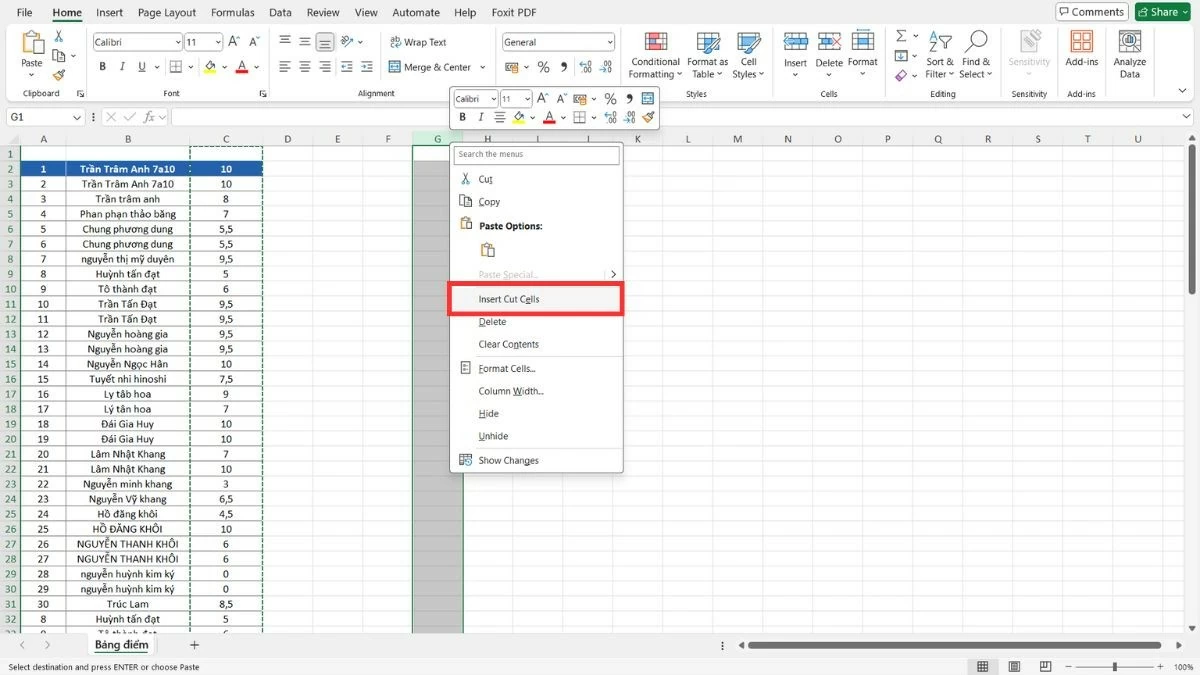
Step 3 : Select the new location, right-click and select "Insert Cut Cells".
 |
Instructions on how to move multiple columns in Excel quickly
With flexible ways to move columns in Excel, you can arrange your data the way you want, making your spreadsheet more intuitive and easy to understand. You can choose between drag and drop or cut and paste methods to move columns effectively.
Drag and drop multiple columns in Excel
Drag and drop method makes it easy to rearrange large groups of data. If drag and drop is difficult due to large number of columns, you can choose another way to do it.
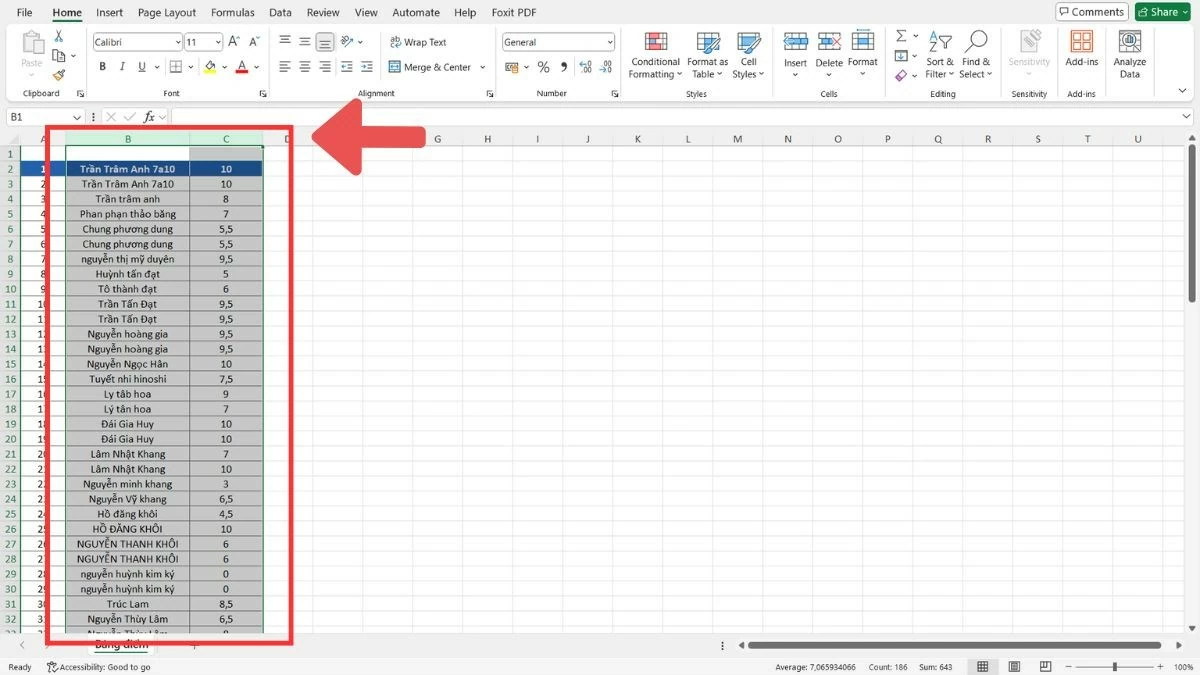
Step 1 : Place the cursor on the first column name, hold the mouse and drag to the right until you have selected all the columns you want to move.
 |
Step 2 : Once you have selected the columns, move the mouse pointer to the edge of the column until a four-way arrow icon appears.
 |
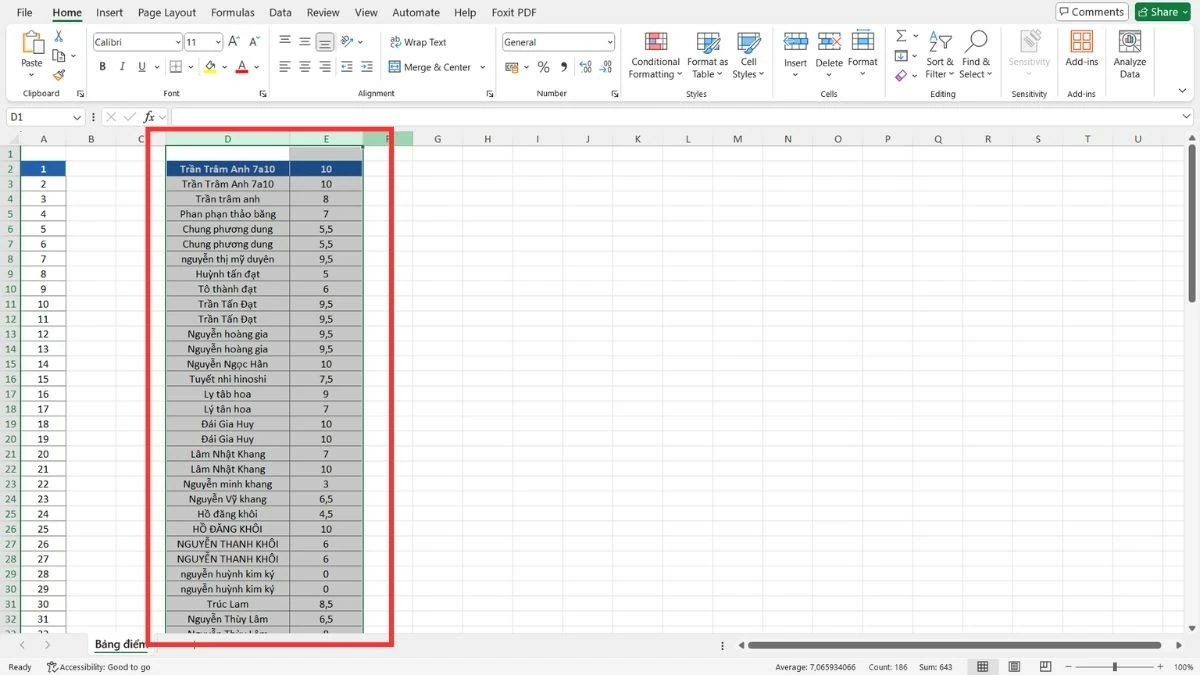
Step 3 : Drag the columns to the desired position and release the mouse.
 |
How to copy and paste columns in Excel
This is an alternative method when drag and drop is not convenient, especially when you need to move a column to a far location in Excel without using drag and drop. This method helps preserve data without causing unwanted changes.
Step 1 : Drag the mouse over the column names to select the columns you want to move.
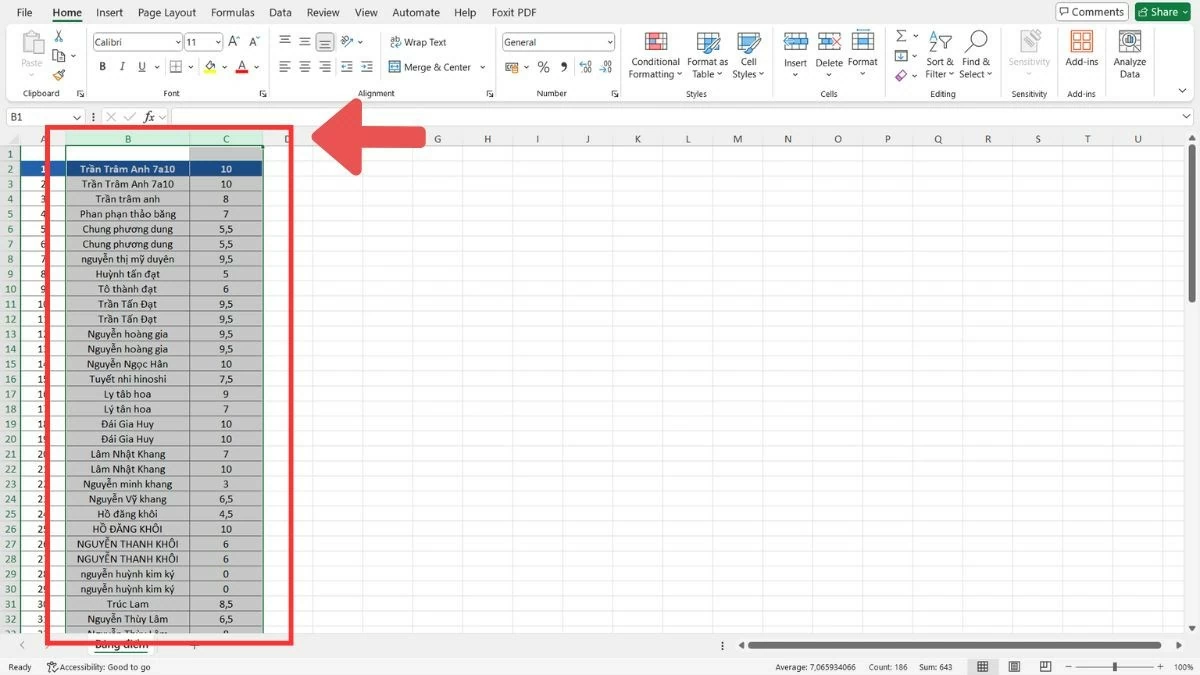 |
Step 2 : Press Ctrl+C or right-click and select "Copy" to copy the selected columns.
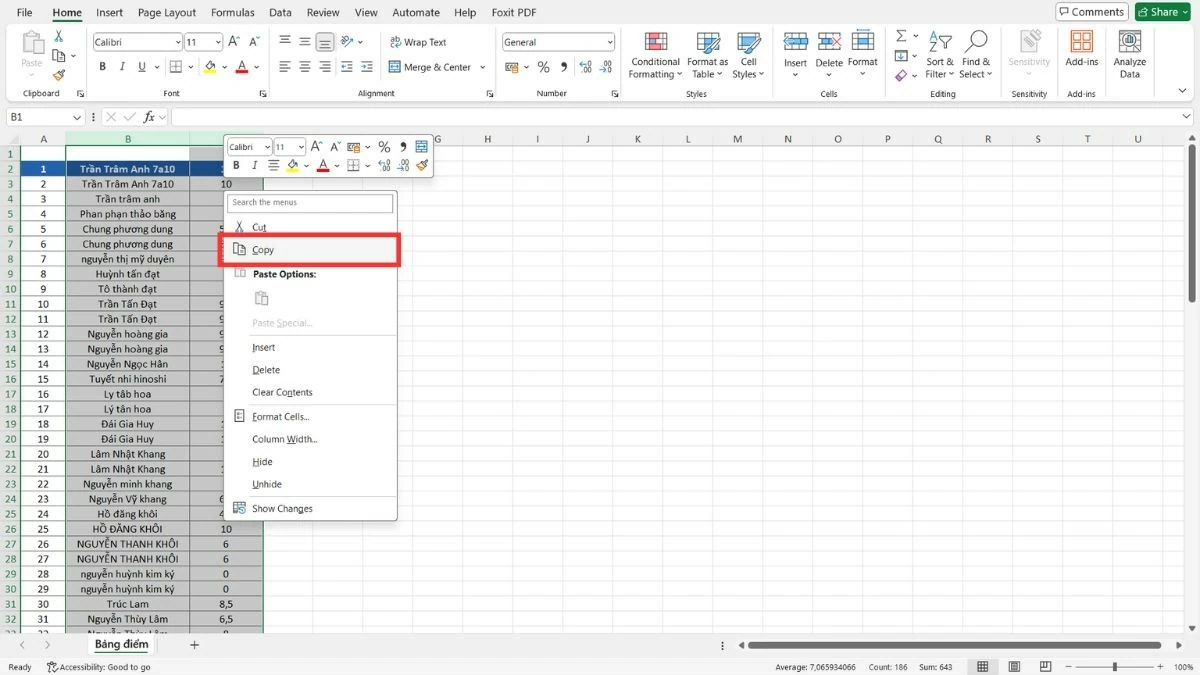 |
Step 3 : Go to the new location, right-click and select "Insert Copied Cells".
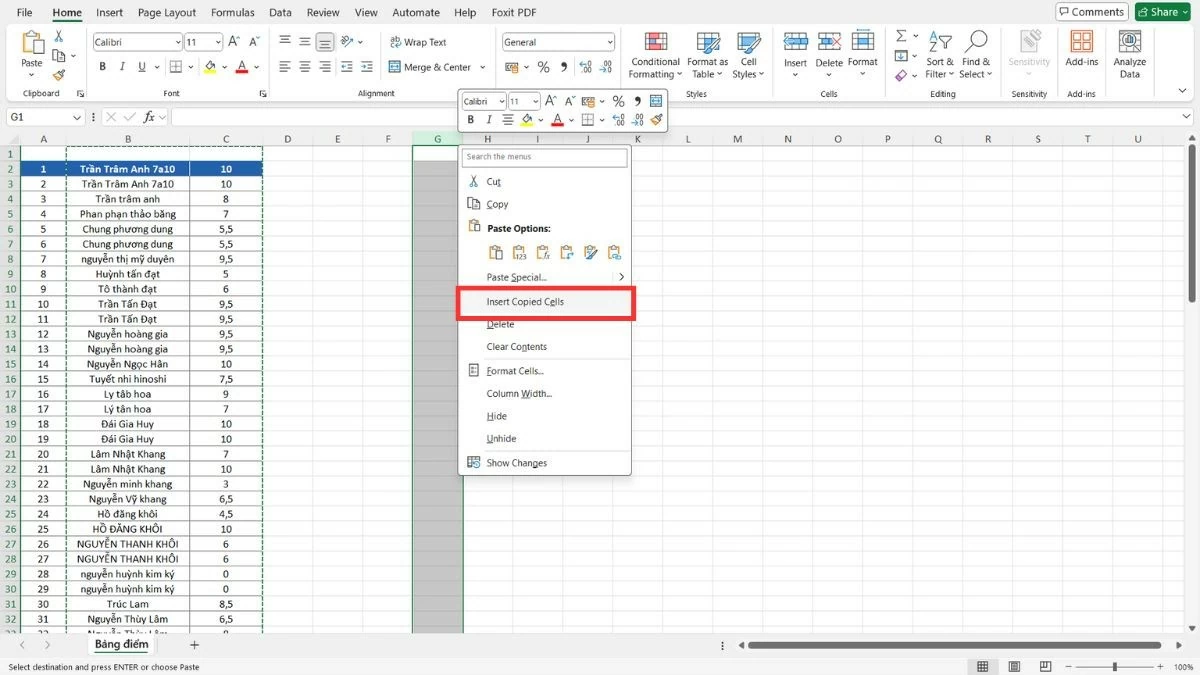 |
Step 4 : Once the data has been transferred, you can select "Delete" to delete the old columns.
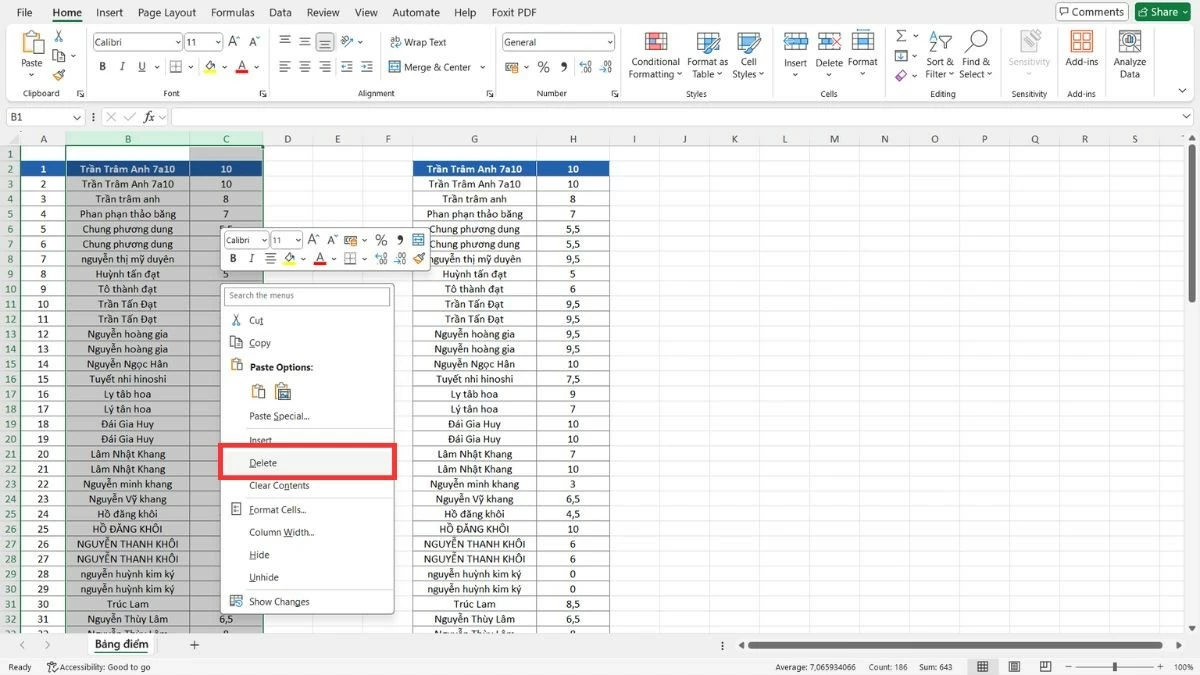 |
Instructions on how to move a row in Excel
Just like moving columns in Excel, you can also move rows easily to rearrange the data in the desired order. This method is useful when you only need to change the position of a few rows without affecting the entire table.
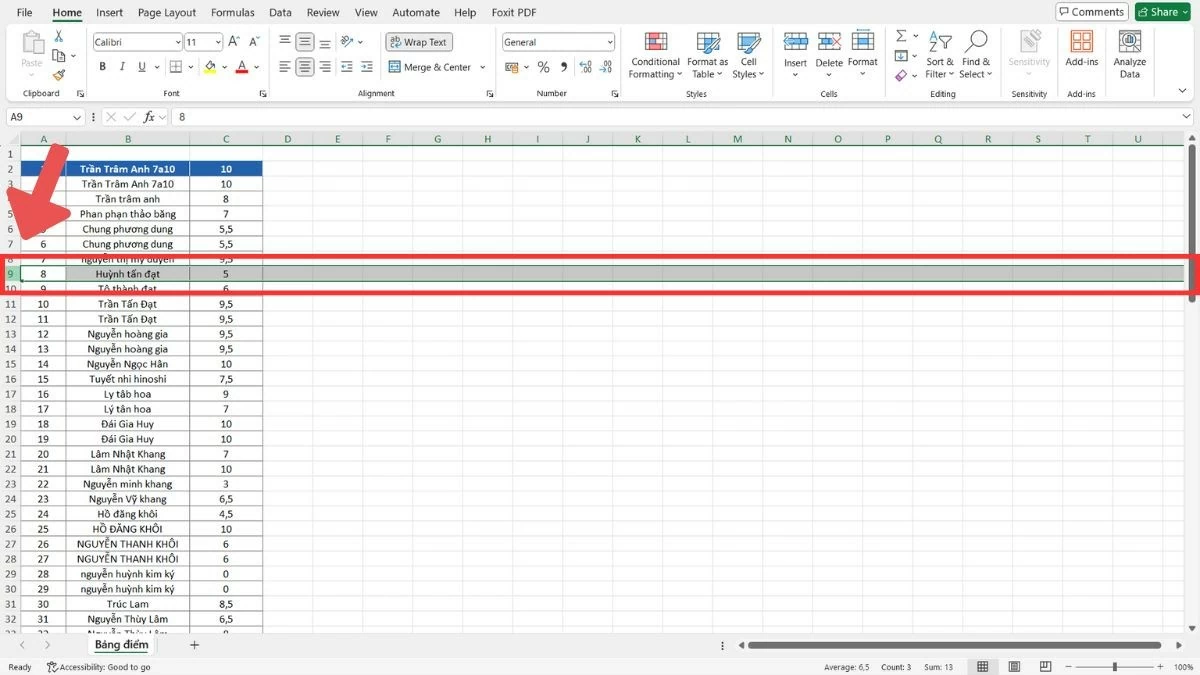
Step 1 : Select the row to move by clicking on the row number on the left of the data table.
 |
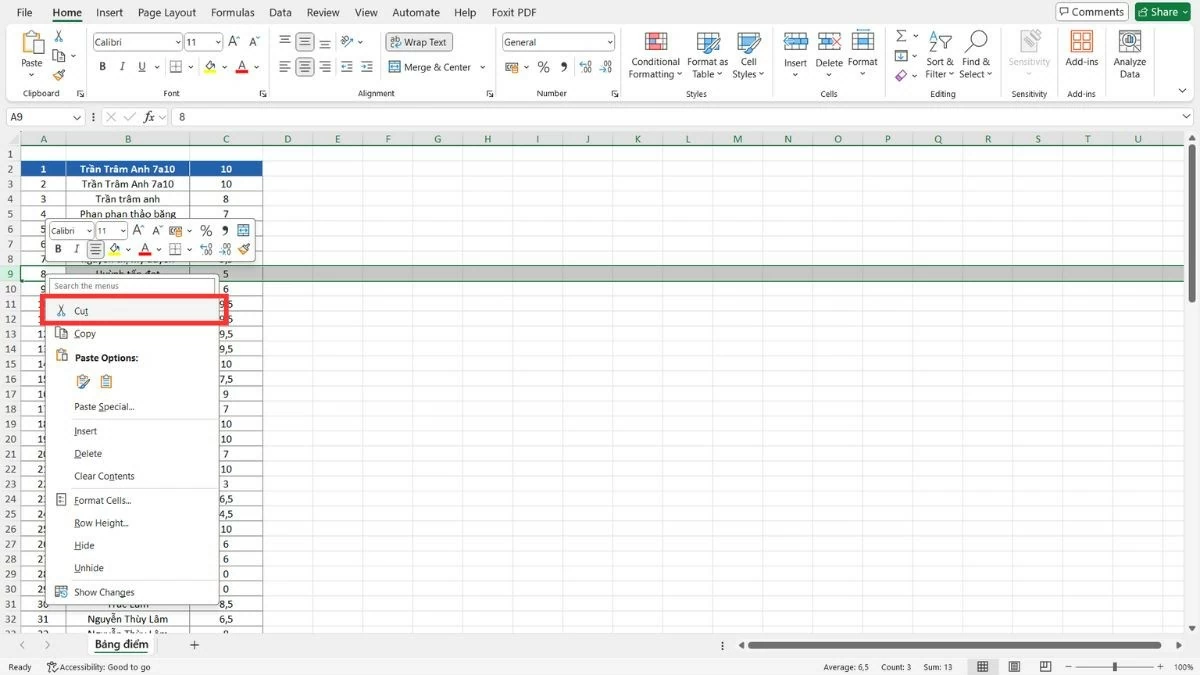
Step 2 : Press Ctrl+X or right-click and select "Cut" to cut the selected row.
 |
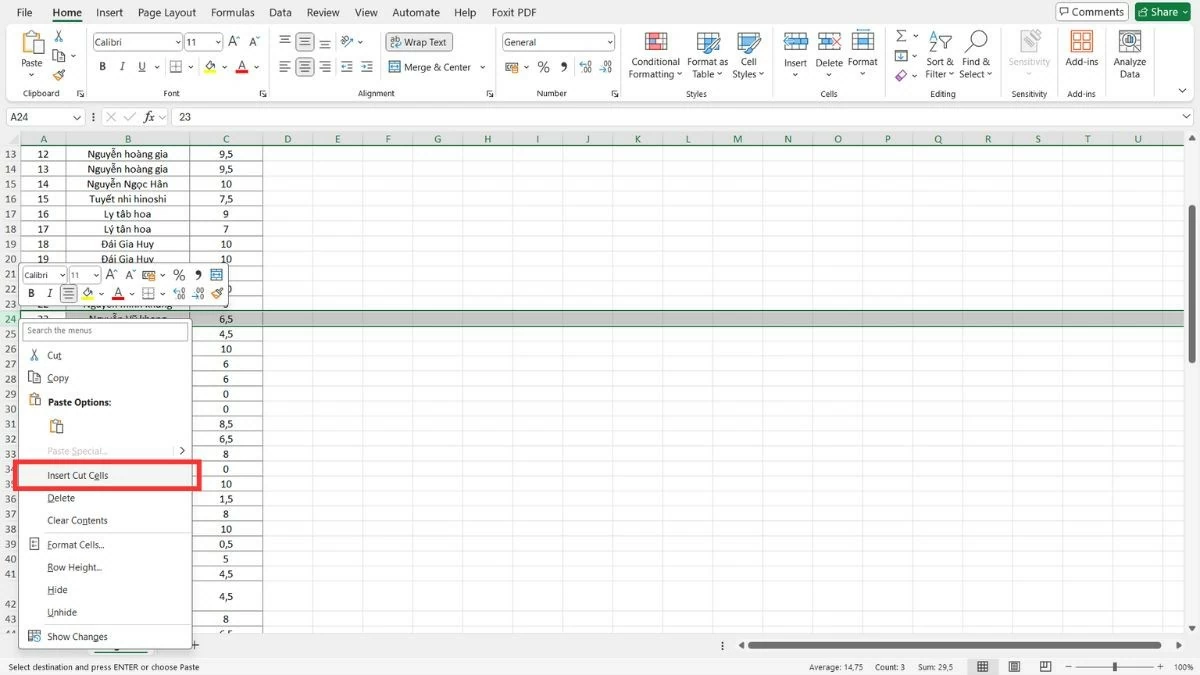
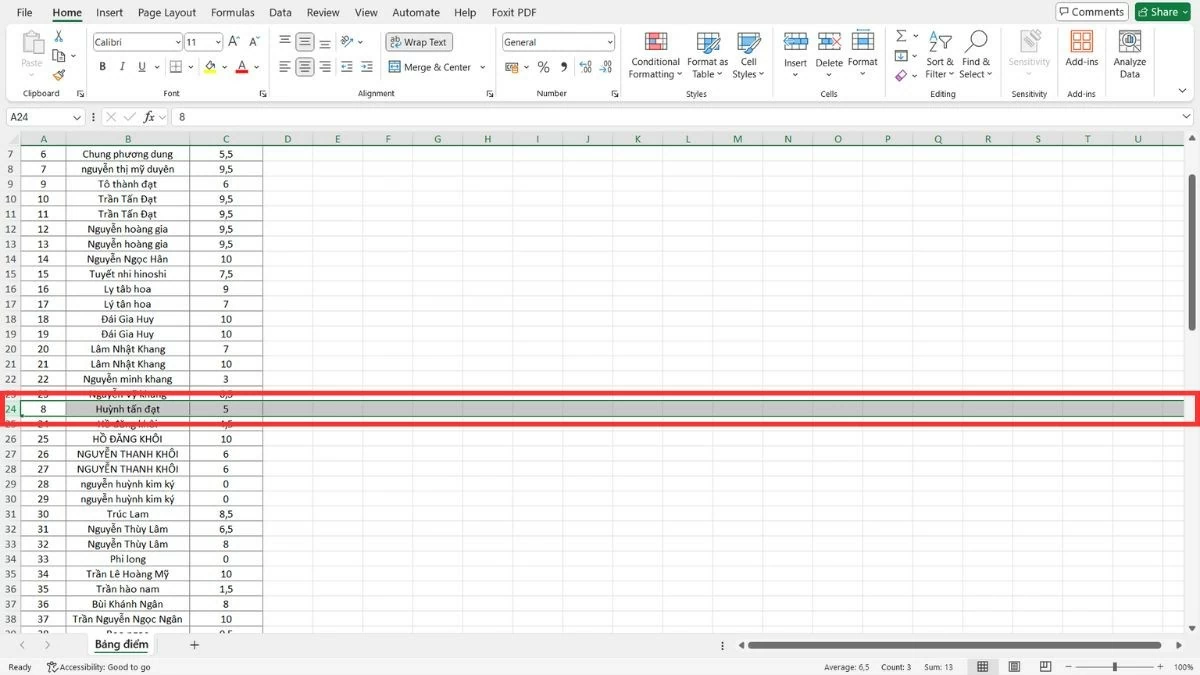
Step 3 : Move to the new location, right-click and select "Insert Cut Cells" to paste the row into that location.
 |
 |
Instructions on how to move multiple rows in Excel
Just like moving columns in Excel, there are two common methods to move multiple rows quickly and efficiently. You can drag and drop directly with the mouse or use copy, paste, and delete operations for more flexibility when moving rows.
Use the mouse to drag and drop multiple rows
Drag and drop multiple rows to help you quickly move groups of related data in Excel.
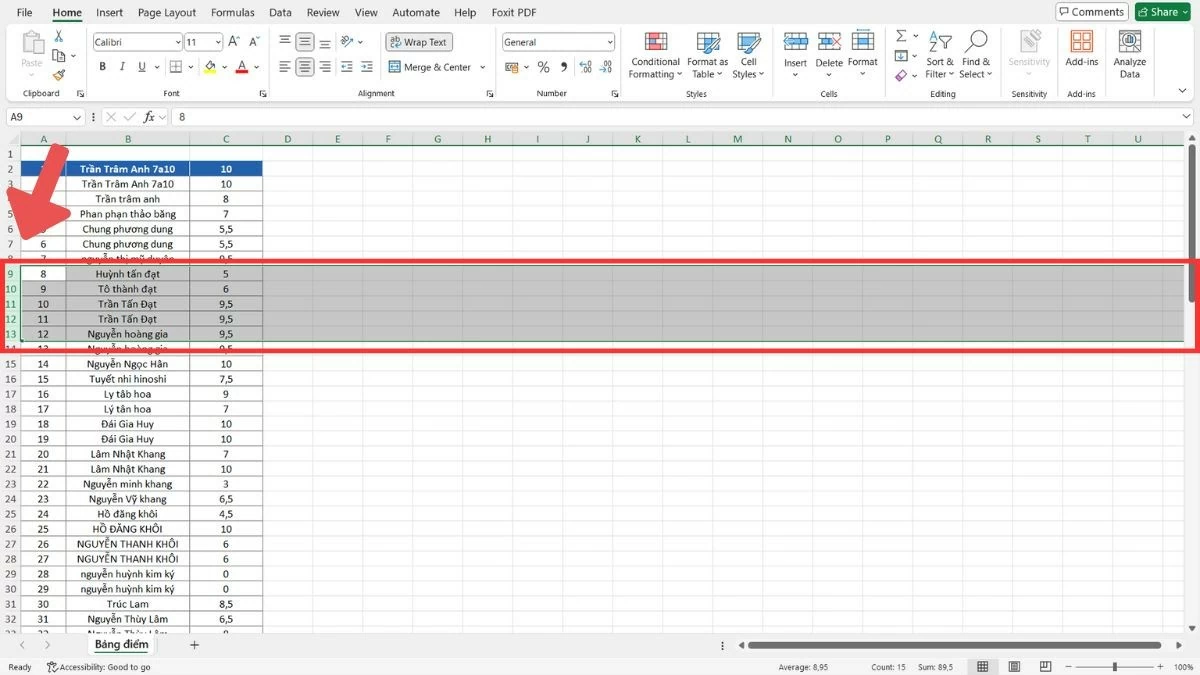
Step 1 : Select the rows to move by dragging the mouse from the first row number to the last row number.
 |
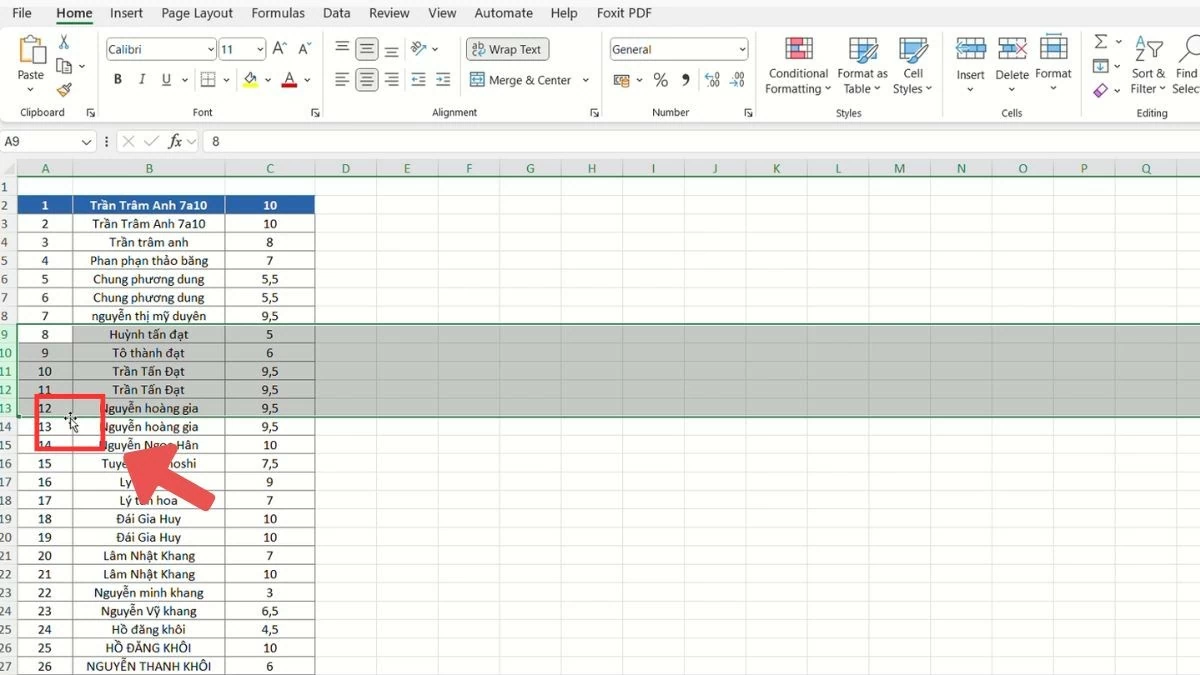
Step 2 : Once selected, move the mouse pointer to the edge of one of the selected rows and wait for the four-way arrow icon to appear.
 |
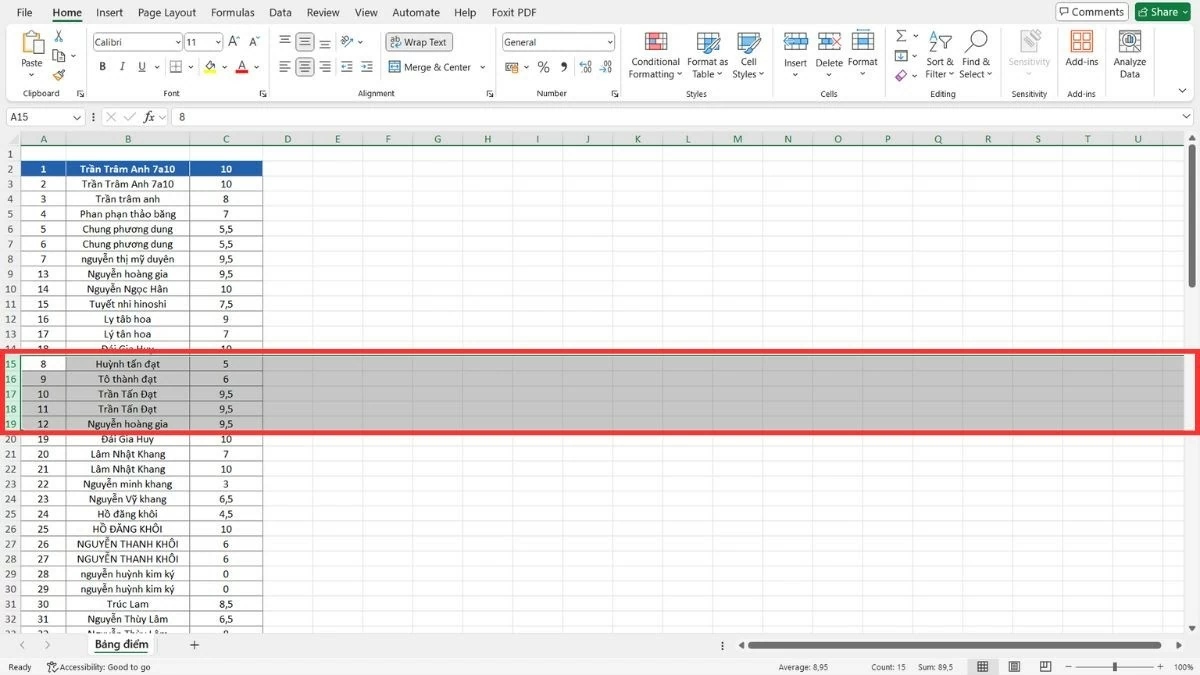
Step 3 : Hold down the Shift key, drag the rows to the new position and release the mouse.
 |
How to use copy, paste, and delete operations to move rows
In addition to moving columns in Excel, you can also use the copy, paste, and delete method to move multiple rows without worrying about changing the size or structure of the table. This method helps you move data accurately without dragging and dropping.
Step 1 : Drag the mouse to select the rows to move.
 |
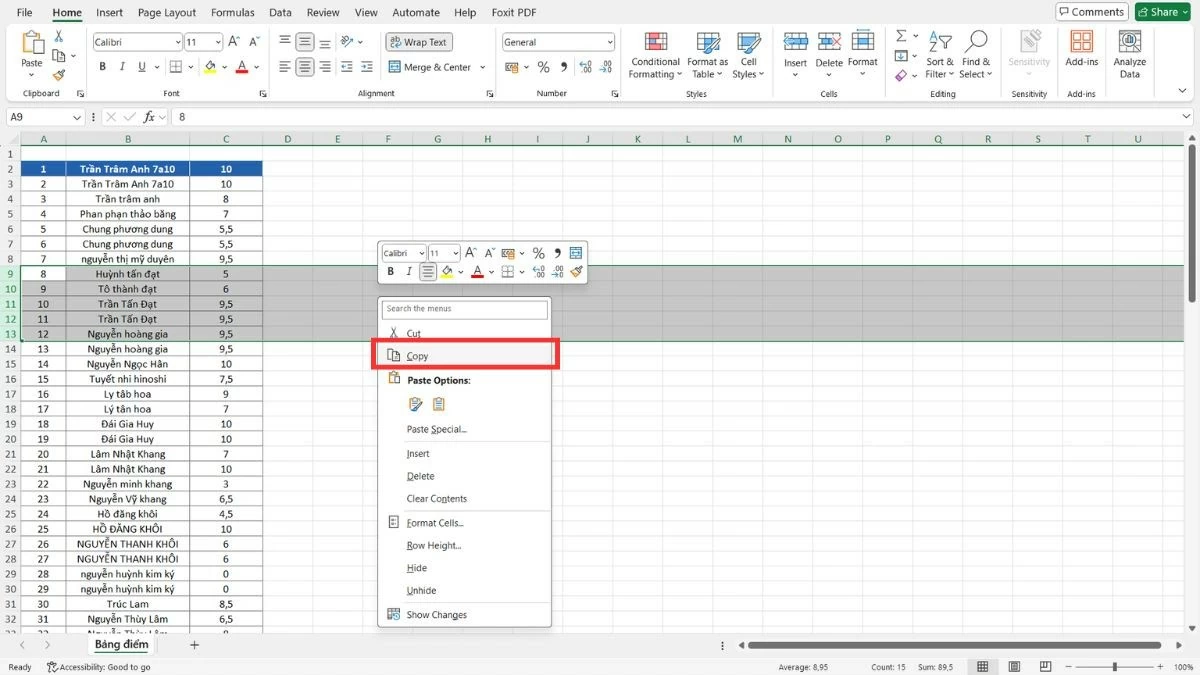
Step 2 : Press Ctrl + C to copy (or select "Copy" from the right-click menu).
 |
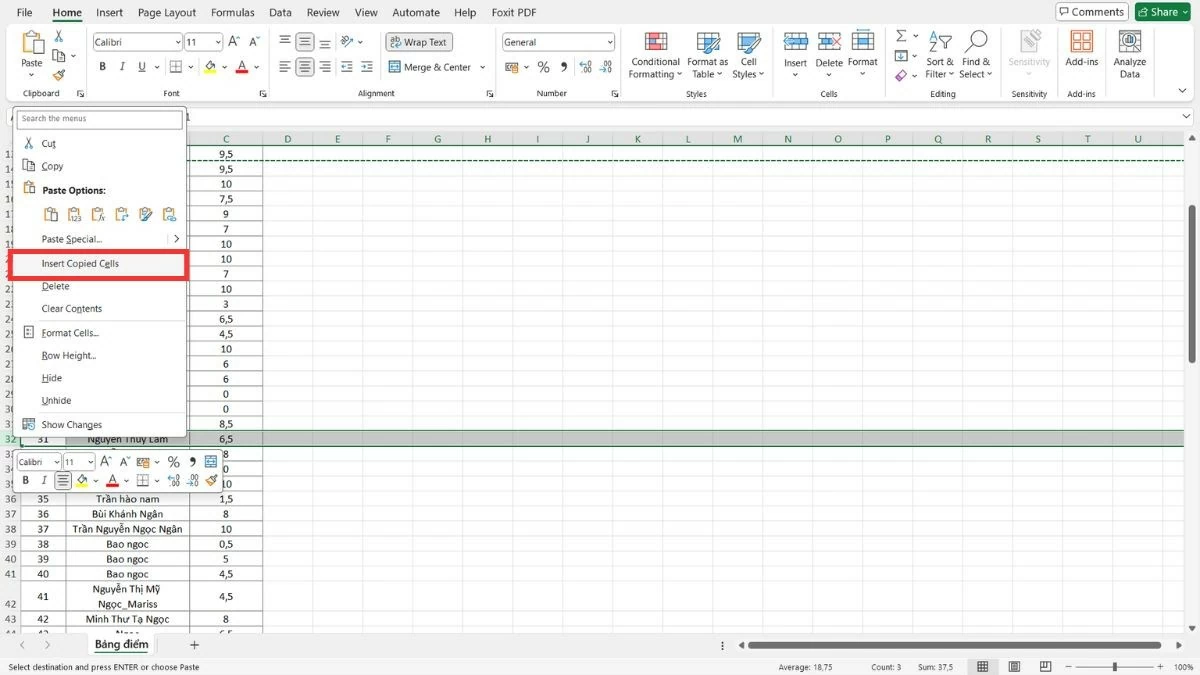
Step 3 : Move to the new location, right-click and select "Insert Copied Cells".
 |
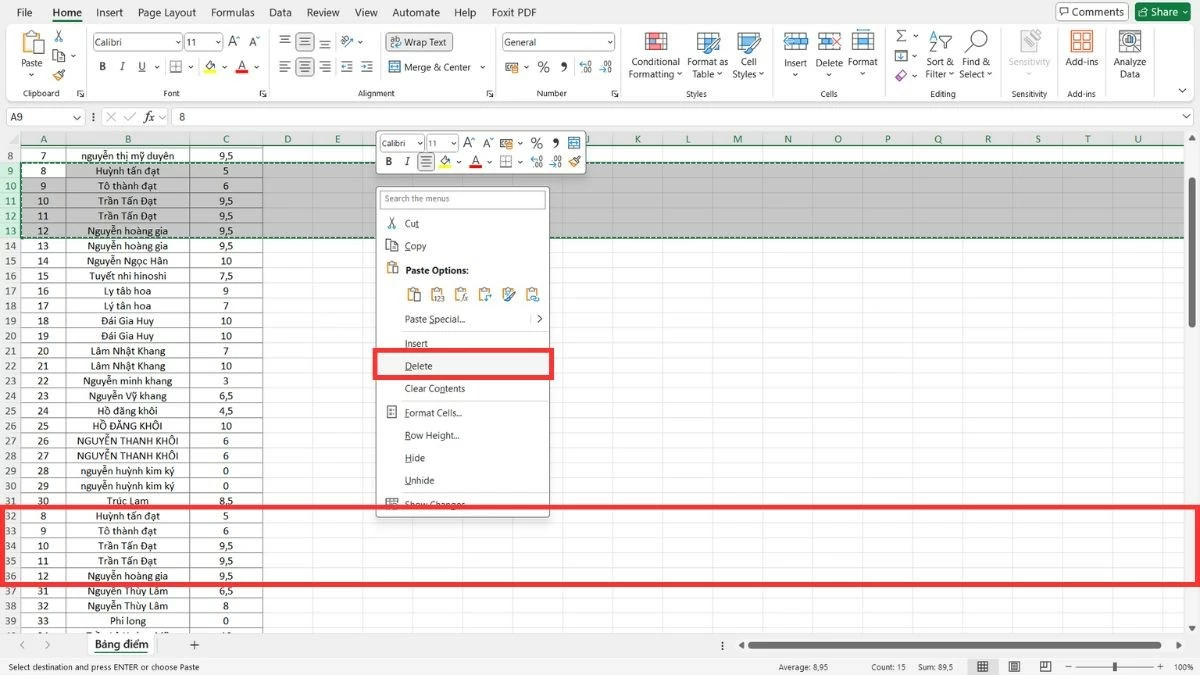
Step 4 : Once the data has been transferred, you can select "Delete" to delete the old rows.
 |
With these detailed instructions on how to move columns in Excel, you will easily organize and arrange data effectively. Mastering the operations of moving columns will help you feel more confident when working with complex spreadsheets. This skill not only saves time but also improves your work efficiency.
Source


![[Photo] Overcoming all difficulties, speeding up construction progress of Hoa Binh Hydropower Plant Expansion Project](https://vstatic.vietnam.vn/vietnam/resource/IMAGE/2025/4/12/bff04b551e98484c84d74c8faa3526e0)





Comment (0)