If you still don't know how to install Vietnamese language for Windows 10 on your computer? The following article will guide you through the easiest way to install it!
 |
| How to install Vietnamese language for Windows 10 simply |
How to install Vietnamese language for Windows 10 from Windows Settings
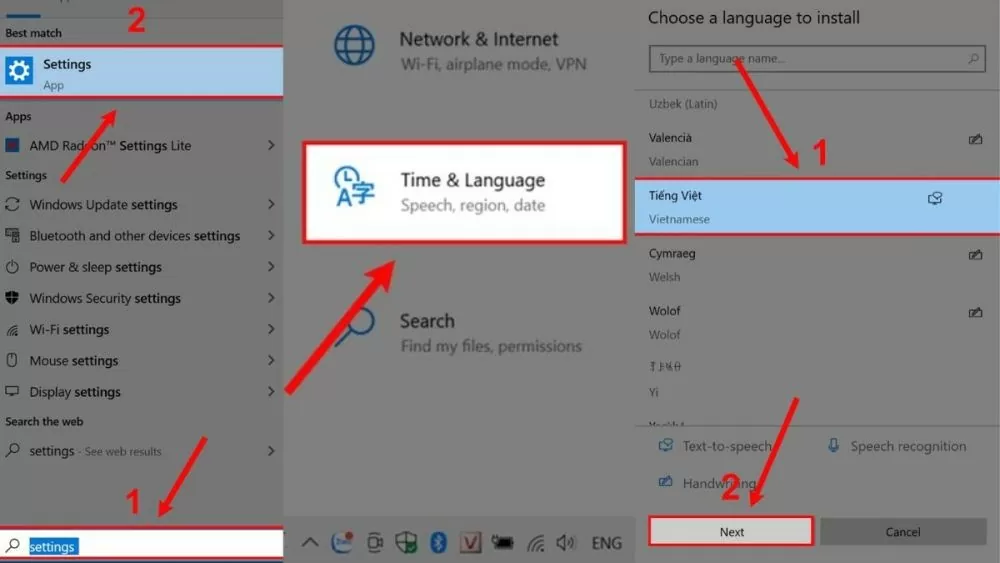
In just 5-10 minutes, you can install Vietnamese language for Windows 10 via Windows Settings. Follow the steps summarized below to do this quickly:
Step 1: On the taskbar, click the Start button and select the Settings gear icon.
Step 2 : Select Time & Language and then select Language.
Step 3: Here, you add Vietnamese by selecting "Add a language" and clicking Next to complete the language installation for Windows 10.
 |
| How to install Vietnamese language for Windows 10 simply |
How to use language packs on Microsoft Store
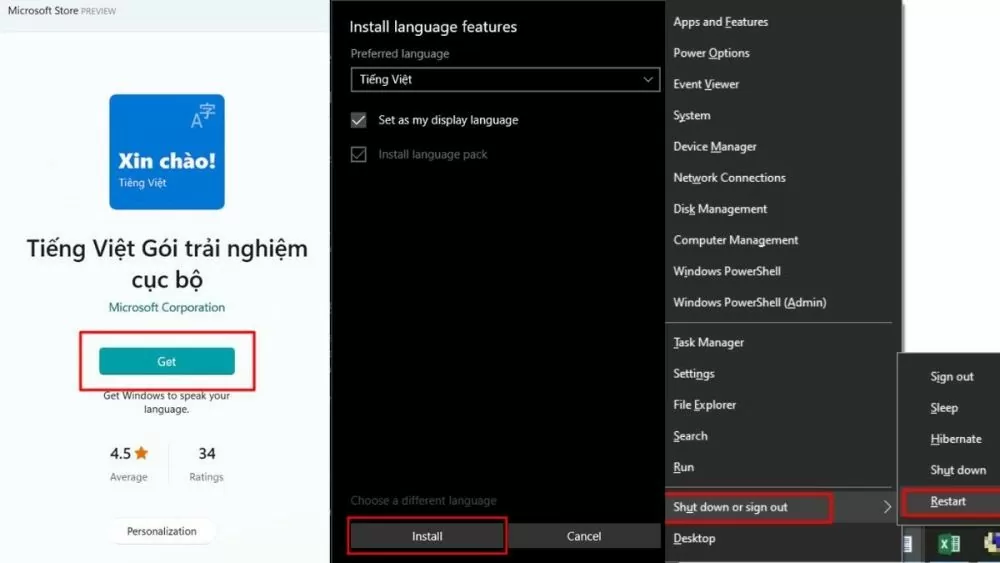
In addition to installing via Windows Settings, you can also install Vietnamese language for Windows 10 by downloading the language pack as follows:
Step 1: To successfully use the language pack, you need to install "Vietnamese - Local Experience Pack" which will be available in the Microsoft Store.
Step 2 : After successful installation, you will automatically go to the Languages section in Settings. Here, just click "Install" to start installing Vietnamese language for Windows 10.
Step 3 : Finally, log out of your Windows account and restart to complete applying Vietnamese language to Windows 10.
 |
| How to install Vietnamese language for Windows 10 simply |
How to update region changes after changing language on Windows 10
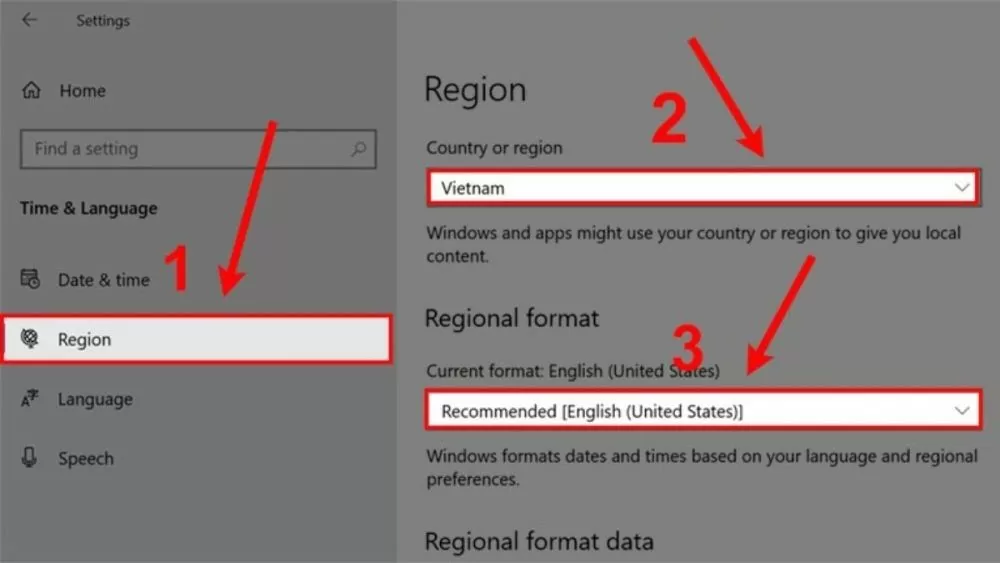
If you have installed Vietnamese language for Windows 10 according to the instructions above, don't forget to update the region for your computer.
Step 1 : To change the region, first click the Start button and select the Settings gear icon.
Step 2: Select Time & Language and then click on Region.
Step 3: In the Country or region section, select the area you live in and adjust the Regional format section to ensure the date and time are displayed correctly.
 |
| How to install Vietnamese language for Windows 10 simply |
Instructions on how to install Vietnamese typing software for Windows 10
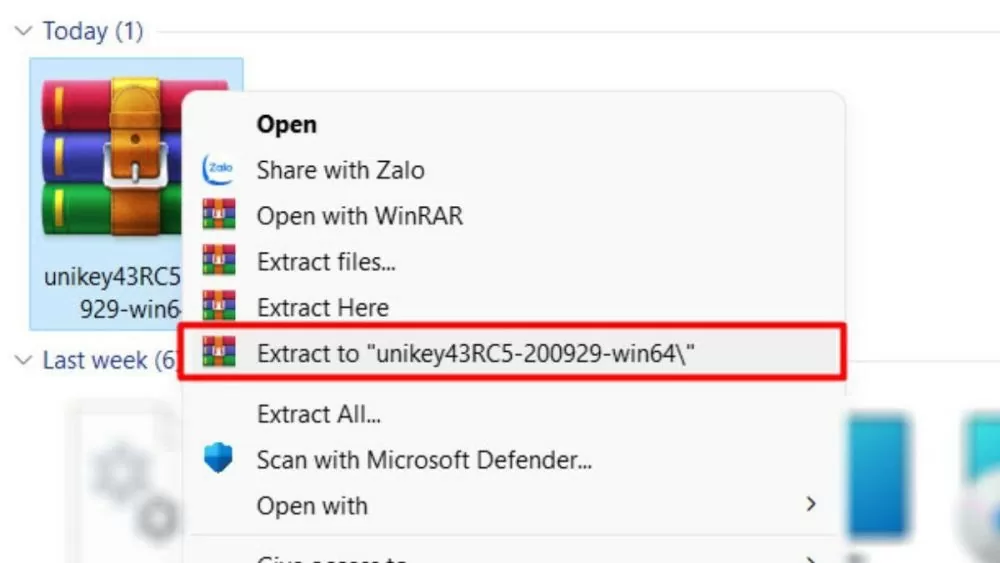
To install Vietnamese typing software for Windows 10, just follow the instructions below:
Step 1: After downloading the UniKey version suitable for your operating system, click "Extract to" to proceed with decompression.
 |
| How to install Vietnamese language for Windows 10 simply |
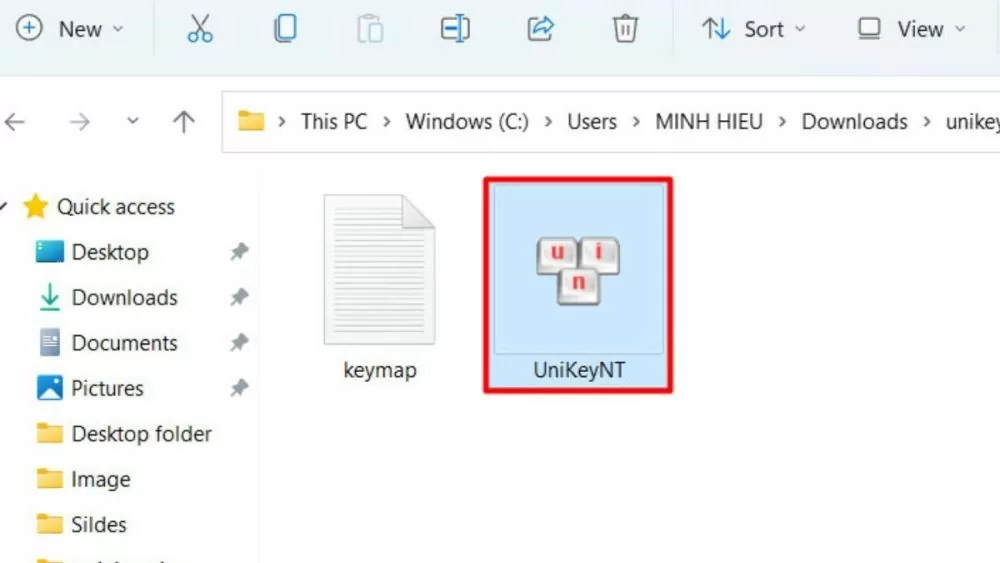
Step 2: Run the installation file named UniKeyNT.exe to continue installing and using UniKey on your operating system.
 |
| How to install Vietnamese language for Windows 10 simply |
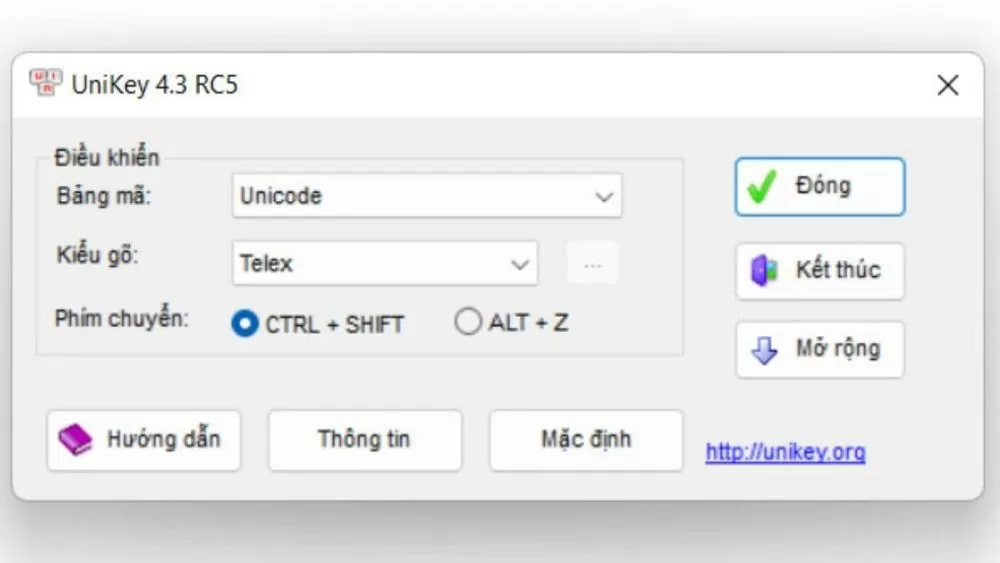
Step 3: After installation is complete, to start UniKey, click on the UniKey icon on the taskbar or Start menu. Then, you can adjust settings such as typing method, encoding, and other settings.
 |
| How to install Vietnamese language for Windows 10 simply |
Instructions on how to switch languages between keyboards simply
After reinstalling the language for Windows 10, you can easily switch between different languages when editing text as follows:
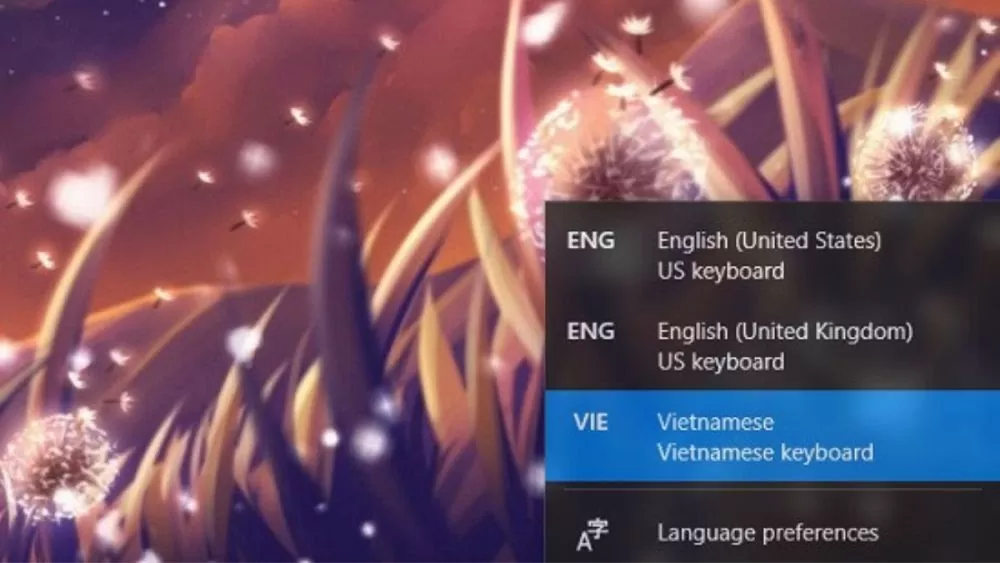
Step 1: First, click on the language icon on the taskbar. This icon usually displays two letters that represent the language currently in use.
Step 2: When the list of available languages appears, select the language you want to change to.
Step 3 : Once you have finished selecting, you can start typing in that language. Your computer's keyboard will automatically switch to the layout appropriate to the selected language.
 |
| How to install Vietnamese language for Windows 10 simply |
The content of this article has detailed instructions on how to install Vietnamese language for Windows 10 that I have compiled to share with you. Now, you can successfully install the language for Windows 10 as you wish.
Source: https://baoquocte.vn/cach-cai-ngon-ngu-tieng-viet-cho-windows-10-don-gian-279201.html




![[Photo] "Beauties" participate in the parade rehearsal at Bien Hoa airport](https://vstatic.vietnam.vn/vietnam/resource/IMAGE/2025/4/11/155502af3384431e918de0e2e585d13a)







Comment (0)