Lacquer art in Vietnam not only plays an important role in expressing the talent and sophistication of the artisans but is also an important part of the country's unique cultural heritage.
The origin of lacquer art
Lacquer art is a traditional art form that dates back thousands of years and developed in several Asian countries, such as China, Japan, Korea and Vietnam. Lacquer art involves creating paintings or decorations by applying lacquer to surfaces, usually wood. Lacquer paintings use traditional lacquer materials such as lacquer, cockroach lacquer as a binder, along with lacquer, silver foil, gold foil, mother-of-pearl, etc., painted on a black background. In modern techniques, lacquer refers to the application of a series of transparent or pigmented coatings, through the evaporation of solvents to create a hard and durable finish. The gloss level of the finish can be adjusted from ultra-matte to high gloss and can be further polished as required. Lacquer finishes are typically harder and more brittle than oil or latex coatings and are usually applied to hard, flat surfaces.
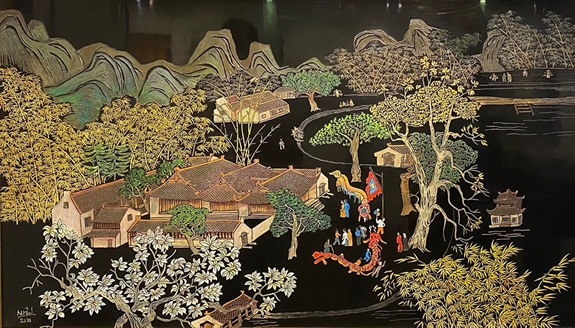 Work "Chua Thay". Author: Ngo Thanh Nhan.
 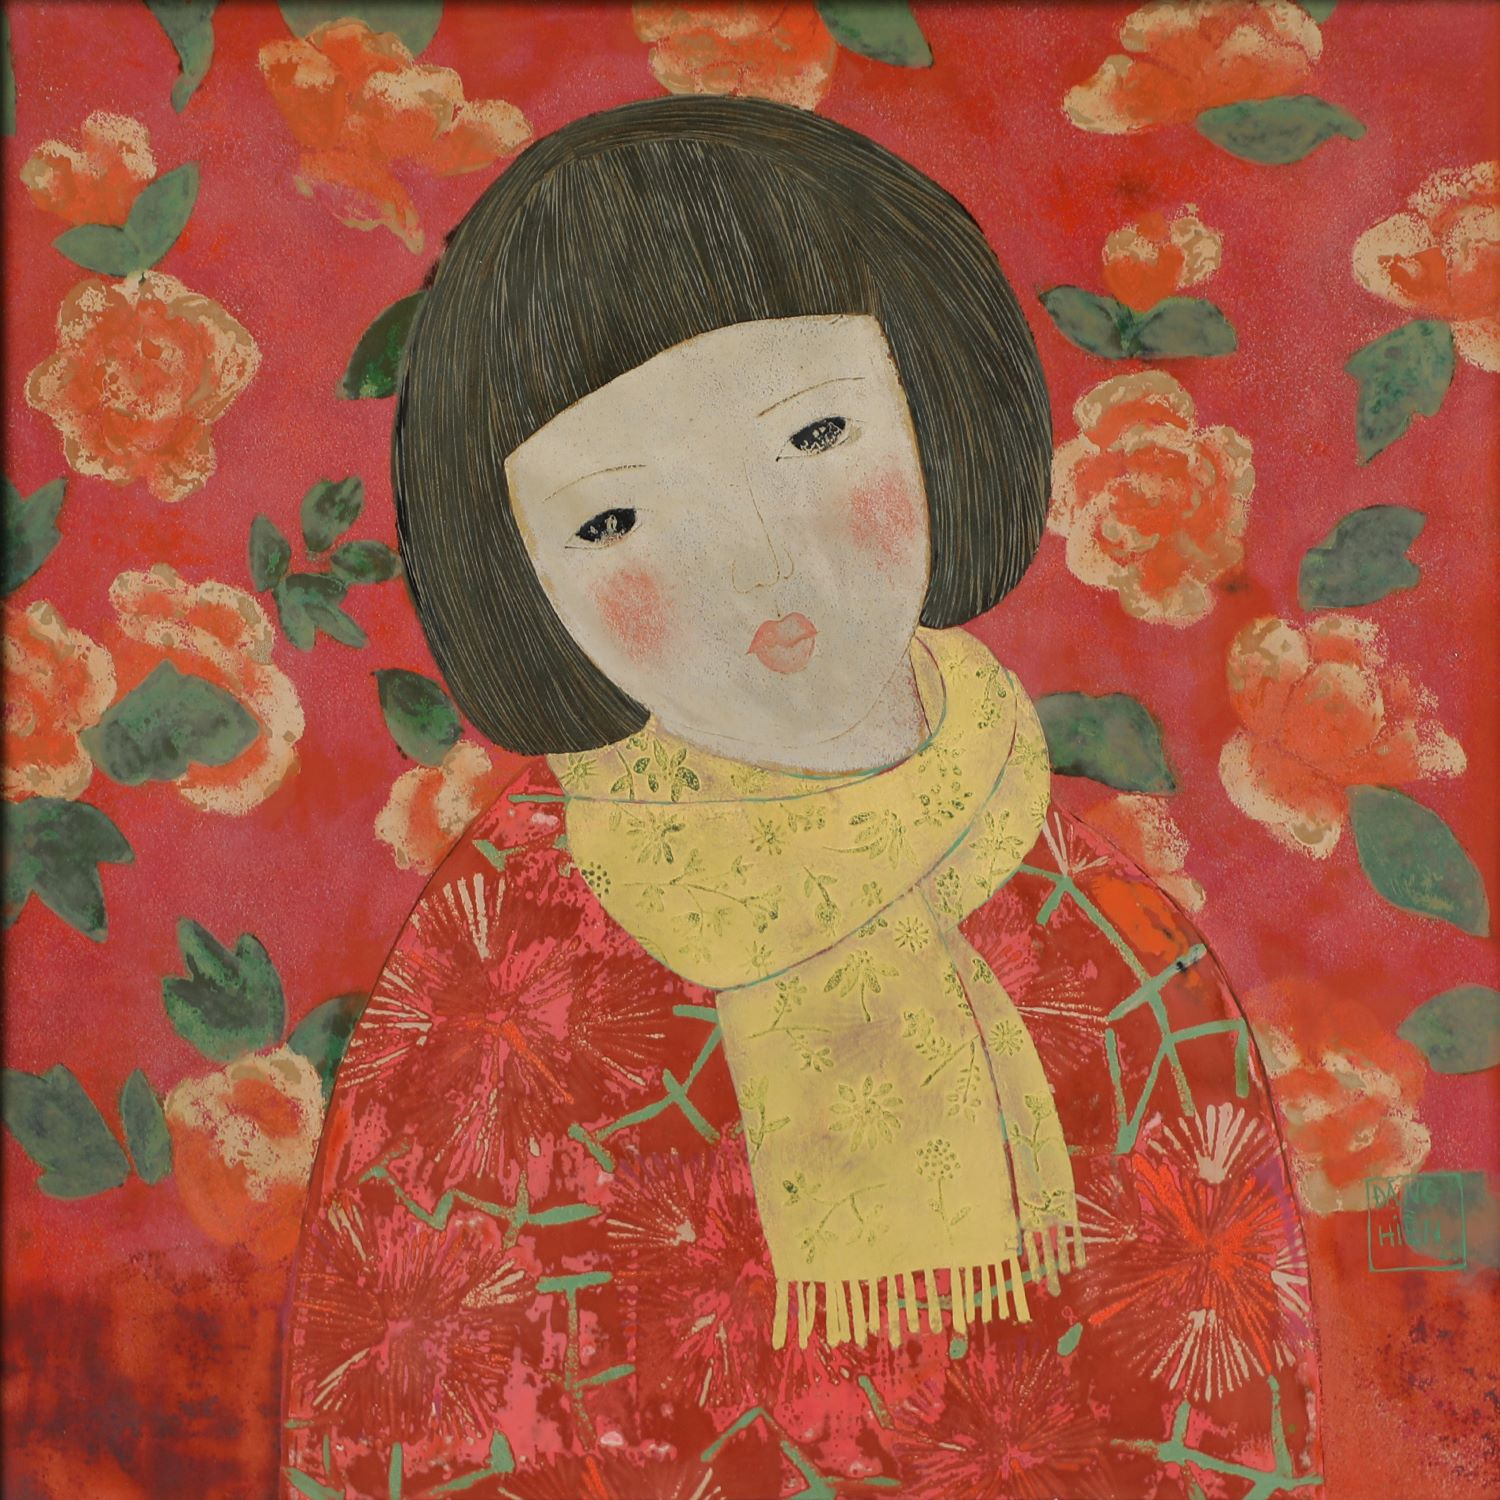 Lady of the Camellias. Author: Hoai Nhan.
Lacquer art often requires great skill, patience and technique, as the process of creating a lacquer work often takes a lot of time and effort. The motifs and themes in lacquer art are often diverse, from natural scenes, flowers, animals, to traditional symbols or traditional stories. Lacquer art is not only beautiful but also shows the technique and soul of the craftsman. This is a precious traditional art form and has existed for thousands of years.
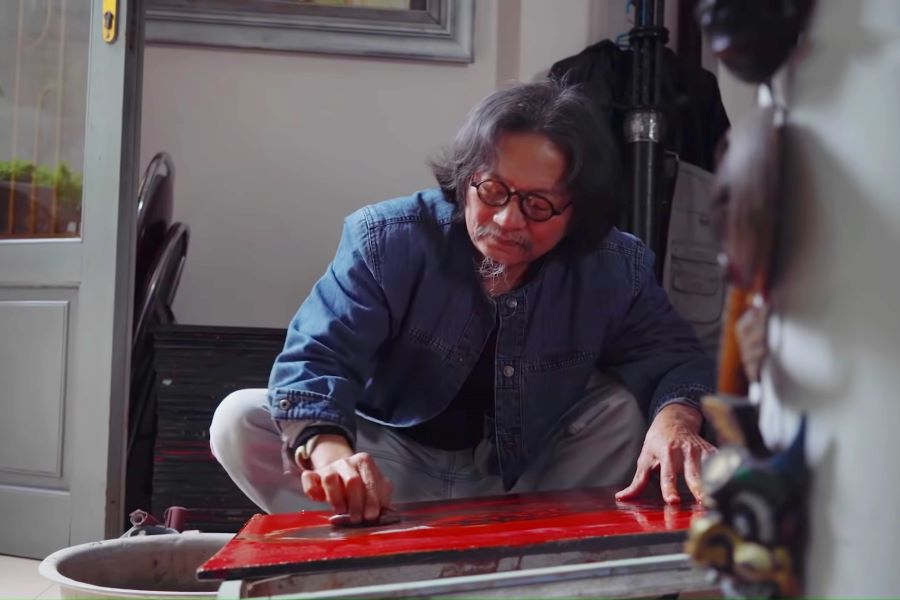
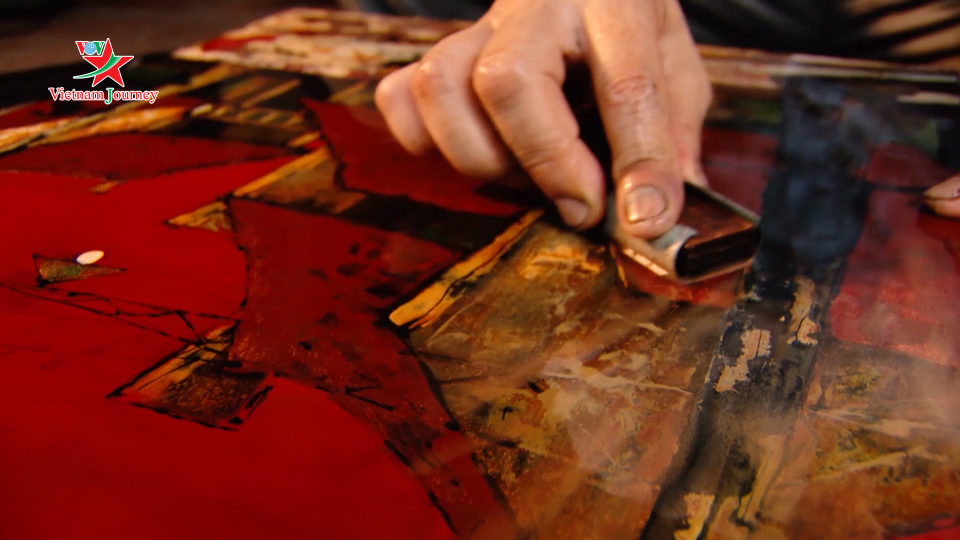 The process of creating a lacquer painting requires the artist's skill and meticulousness. Photo: Vietnam Journey.
The process of creating a lacquer painting
Ingredient
A lacquer product uses many materials: paint, color and other materials. Some common materials include:
- Paint: extracted from lacquer trees, also used are tung oil, canarium oil, turpentine and acacia resin...
- Color: Traditional lacquer uses two basic colors, black and red, which are made from inorganic minerals (for example: vermilion) so they do not decompose with light and time.
- Silver products such as silver foil, silver stickers, ground silver, silver ingots...
- Gold products such as gold leaf…
- Other materials: eggshells, pearl shells, snail shells, scallop powder...
Main steps in creating a lacquer painting
To create a lacquer painting, it requires many stages and each stage is meticulously done. It can be said that lacquer technology is based on basic principles but has significant variations in the experience and techniques of each individual, family or each type of product, such as paintings, statues, decorative objects or gold coating. The process of making a lacquer painting usually includes two main stages: hardware and software.
Hardware: At this stage, usually the artist will not directly make a complete panel but instead, professional workers will take charge. There will be basic steps to create a panel as follows:
Step 1: Prepare a wooden board as required, the worker will process the wooden board to be flat, square and the right size.
Step 2: Cover the surface of the wooden board with a layer of raw paint, then cover the wooden board with a cloth and leave it to incubate for 1 to 2 days, depending on the weather.
Step 3: Continue to apply a layer of paint mixed with sawdust but do not grind.
Step 4: Continue to apply a layer of raw paint but mix with clay and sawdust, the ingredients are mixed evenly according to the prescribed dosage, applied to the surface of the wooden board and left to incubate. This step is completed by the grinding step after incubating. Continue to perform this step 2 to 3 more times. Step 5: This is the final step in creating the hardware, which is to apply a final coat of paint and finish the panel.
Software: This is the stage where the artist will work directly on the panel. The steps are as follows.
Step 1: Sketch the idea The artist needs to prepare the idea and sketch it with a pencil or charcoal on a piece of paper the same size as the panel. Then use transparent tracing paper to trace everything that has been sketched.
Step 2: Prepare the materials The artist needs to prepare the necessary materials for his painting. The materials include: Chicken eggshells; duck eggs, filters, colors and paint. After having all the materials, the artist will inlay the eggs onto the panel. The artist will use chicken eggshells and duck eggs to express different tones for the painting. Chicken eggs will express warm tones and vice versa, duck eggs will express cold tones. Heat can be used to darken the color of eggshells to different tones such as yellow or dark brown, helping the artist to express the right color needed in the painting.
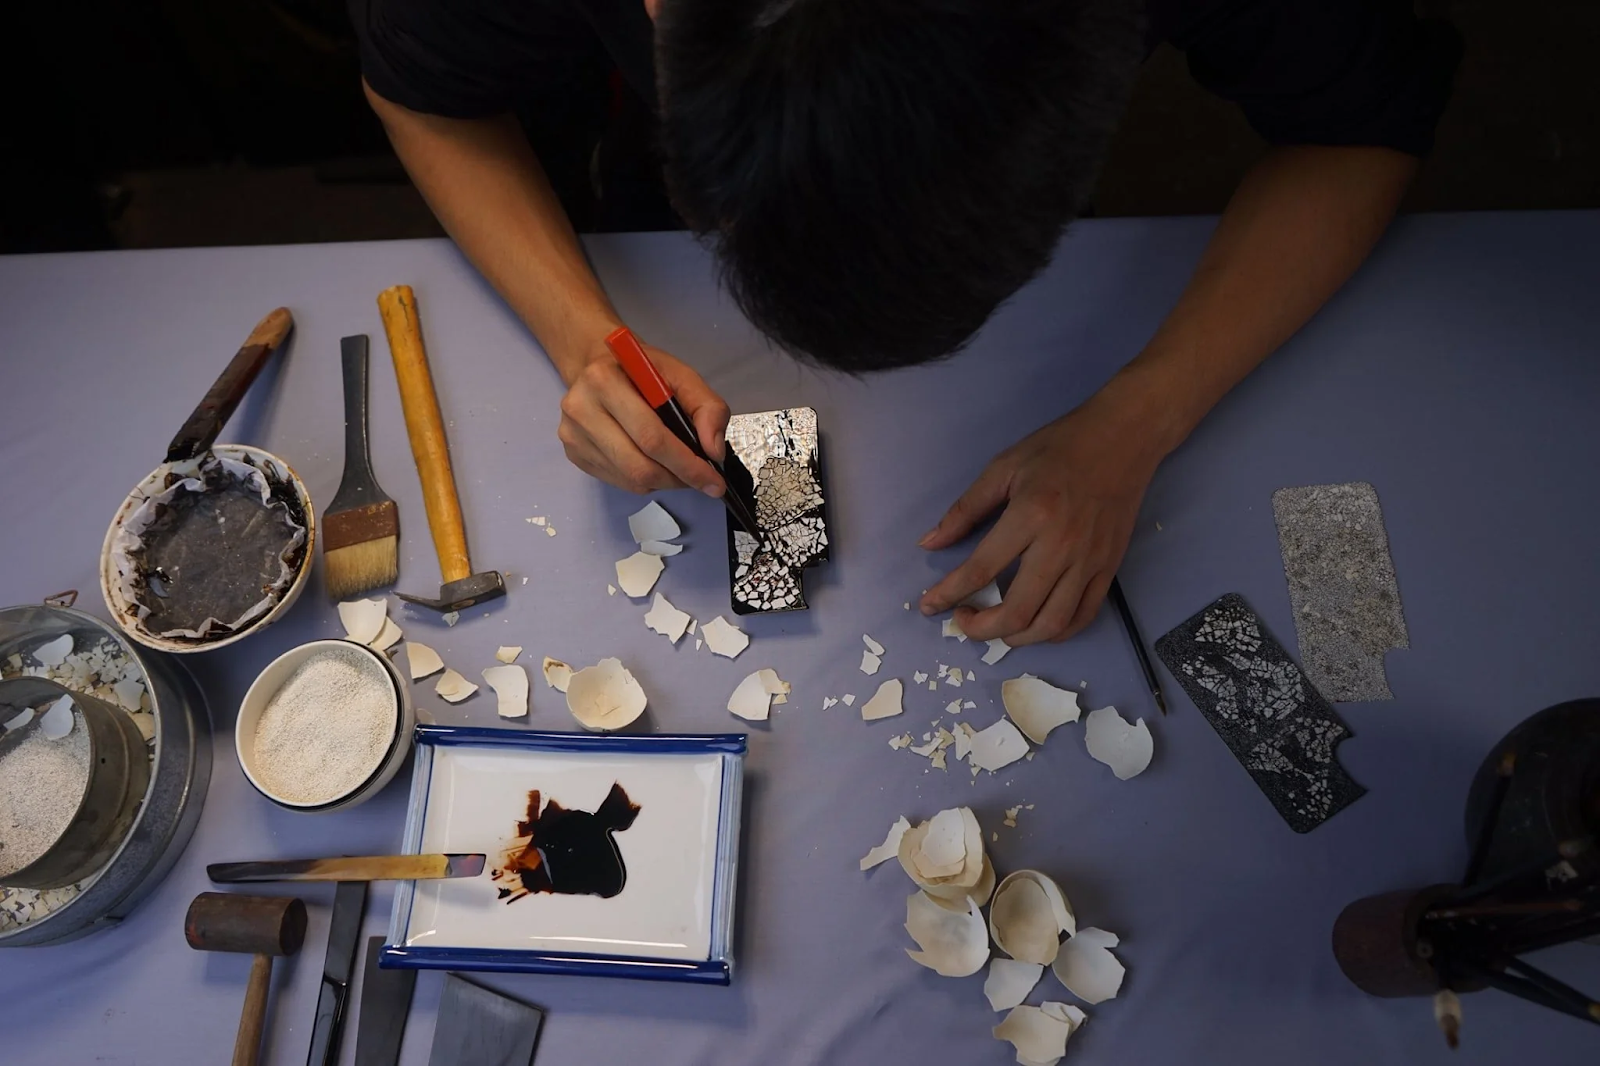 The artist will use chicken and duck eggshells to express different shades for the painting. Photo: lasonmai.vn.
Next, the artist will trace the layout to inlay the eggs onto the canvas and begin to attach the eggs to the cockroach wing paint. After attaching the eggs to the necessary areas, the painting will be incubated and dried for 2 to 3 days. When the painting is dry, it will be polished on the surfaces with eggs, the artist will sand as flat as possible compared to the areas without eggs and then re-adjust the image, if necessary.
Step 3: Drawing lines In this step, the artist will use black paint, cockroach wing paint or silver chips to draw detailed images and layouts outside the inlaid egg areas and continue to incubate and polish.
Step 4: Grinding and painting The colors will be mixed and started to be painted. For bright areas, silver chips will be used to trace, the artist will use the above materials to cover the entire painting in many different layers. Each layer is stacked to show the lightness and variety of shades. Just like the process of making the frame, after each layer of silver is applied, the artist will have to grind the painting with a whetstone or with different types of sandpaper with different grits.
 The artist grinds the painting with a whetstone or with different types of sandpaper with different grits to express different shades in the painting. Photo: kiettacnghethuat.com
Step 5: The final step in the process of creating a lacquer painting.
- Toa son: is a technical term for covering an even layer of cooked paint over the entire surface of the painting. The mixing ratio depends on painting experience. It should be diluted if the painting has a good correlation - just the right amount of light and dark, then leave it to dry before polishing.
- Polishing: is the final stage of painting – for small paintings, you can use the palm of your hand to rub quickly and strongly on the surface of the painting. At this stage, the artist needs to be flexible in the way they express themselves to ensure that the painting clearly expresses their intention.
It can be seen that creating a lacquer painting is not easy but requires a period of time and a lot of effort to create a complete lacquer painting.
The silent sacrifice of lacquer painters
Painters cannot immediately express the color they want on the painting when the paint is still wet, the color may be very bright and when it dries it will be darker. The color when not polished and when polished more or less all show different shades. Therefore, to be able to control the material, actively create color requires the painter to have many years of experience in the profession. An important material to create a lacquer painting with timeless beauty is lacquer. Lacquer, also known as permanent paint, is a traditional paint often made from lacquer trees, the resin is taken from the lacquer tree and then mixed with natural pigments for painting. Although lacquer has high artistic value and is widely used in lacquer. However, in terms of benefits, lacquer brings great harm to lacquer painters because of its toxicity. During the process of creating, artists often encounter some minor accidents such as facial swelling, severe ones such as allergies all over the body, sores on the hands and wounds that take a long time to heal. Although they love lacquer art, many artists have to temporarily put their dreams on hold because their health cannot be guaranteed due to the harmful effects of lacquer.
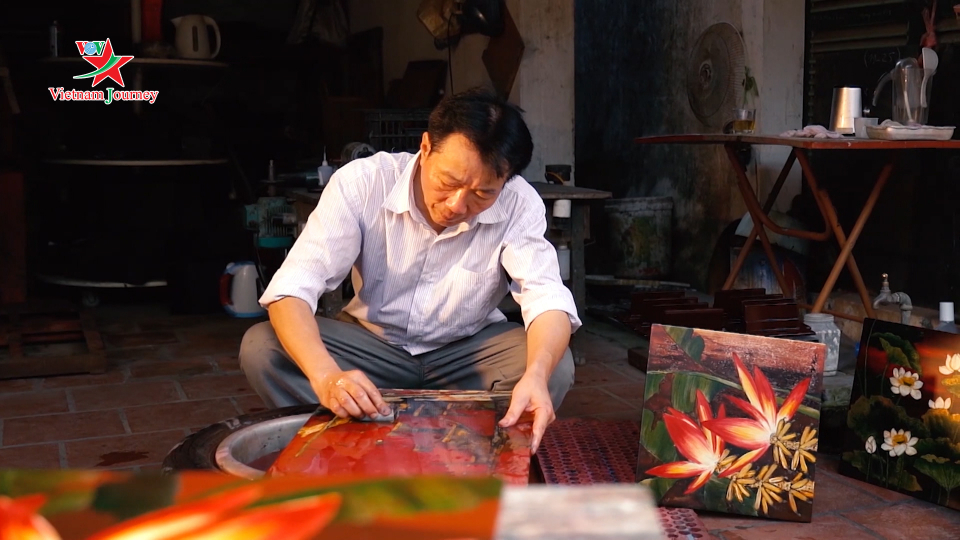 The artists had to overcome many challenges to complete a lacquer painting. Photo: Vietnam Journey .
In addition, completing a lacquer painting depends a lot on the weather. Because you have to wait for the paint to dry before you can continue the creation process. Usually, artists will create lacquer paintings in spring and autumn, avoiding the dry winter. To create beautiful lacquer works, artists have to sacrifice many things, including their health. This is not an easy thing for artists in their journey to pursue art. Lacquer works are the result of tireless efforts, trade-offs, demonstrating the commitment of lacquer artists to art.
Famous lacquer works
Lacquer art in Vietnam not only plays an important role in expressing the talent and sophistication of artisans but also is an important part of the country's unique cultural heritage. With more than a thousand years of history and development, Vietnamese lacquer art has demonstrated creativity, diversity and uniqueness in lacquer works. In addition to expressing artistic values, lacquer is also a source of income for many artisans and craftsmen in Vietnam. At the same time, it is also a means to introduce Vietnamese culture and history to the world. This makes lacquer art not only a traditional heritage but also a symbol of diversity and creative potential in art. Some famous lacquer works:
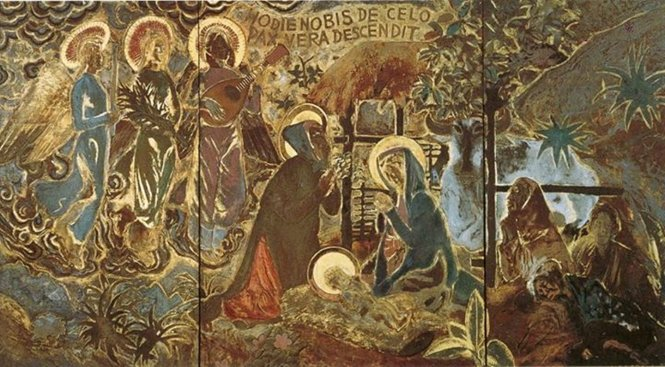 Lacquer painting Holy Night by artist Nguyen Gia Tri (1908 – 1993)
 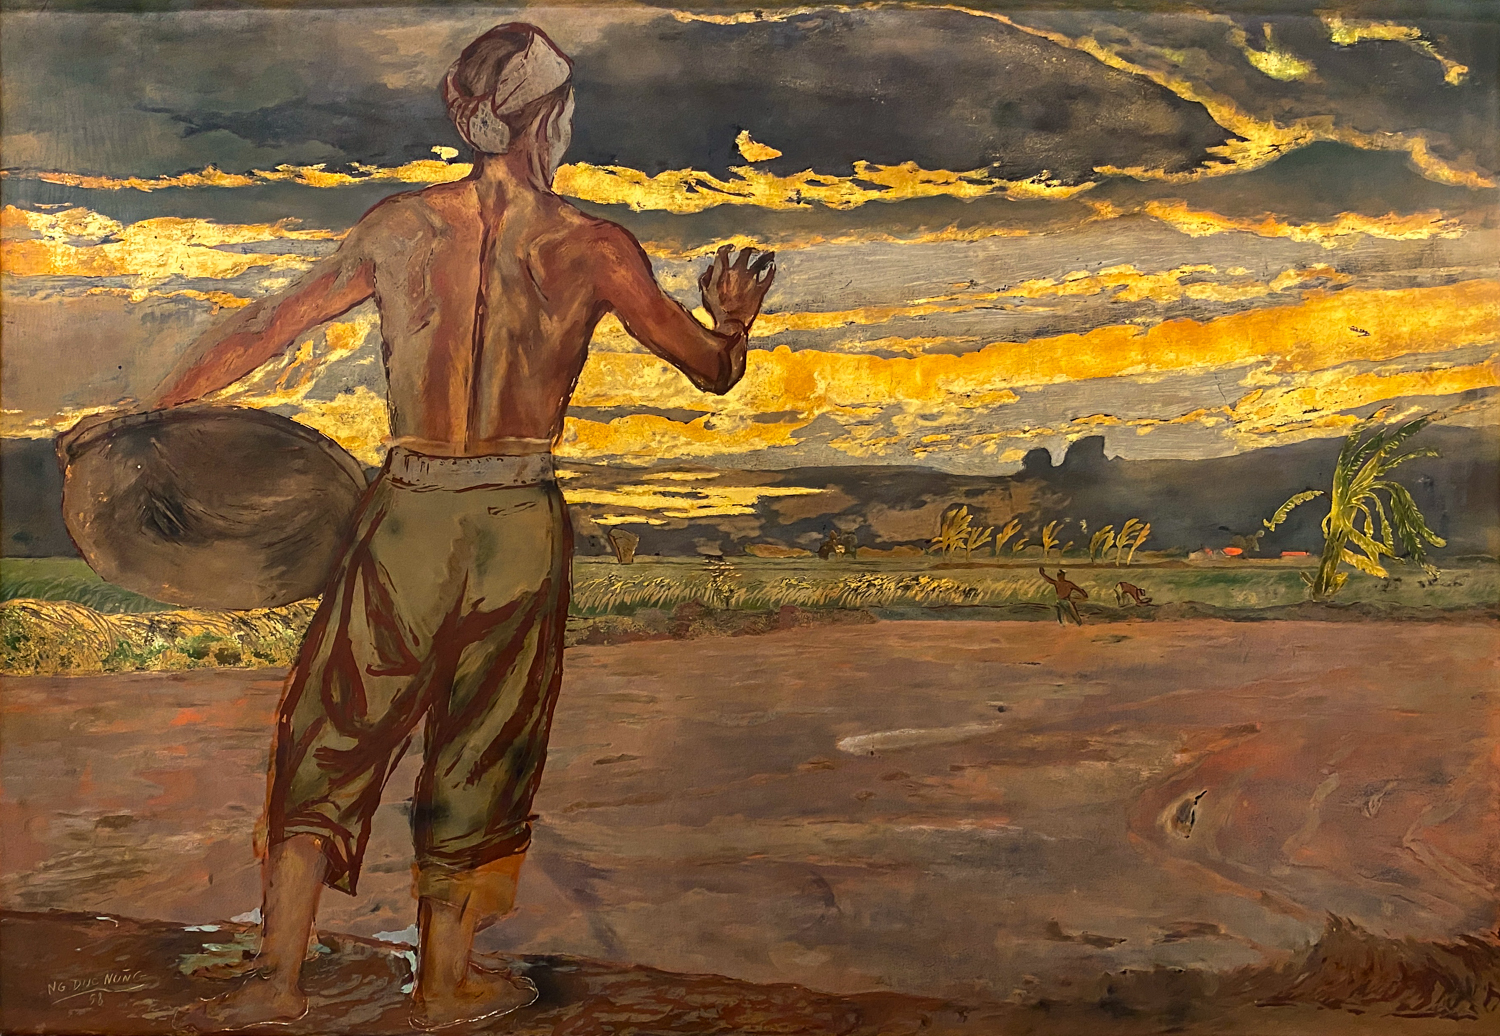 The lacquer painting "Dawn on the farm" was painted by artist Nguyen Duc Nung (1914-1983) in 1958 .
 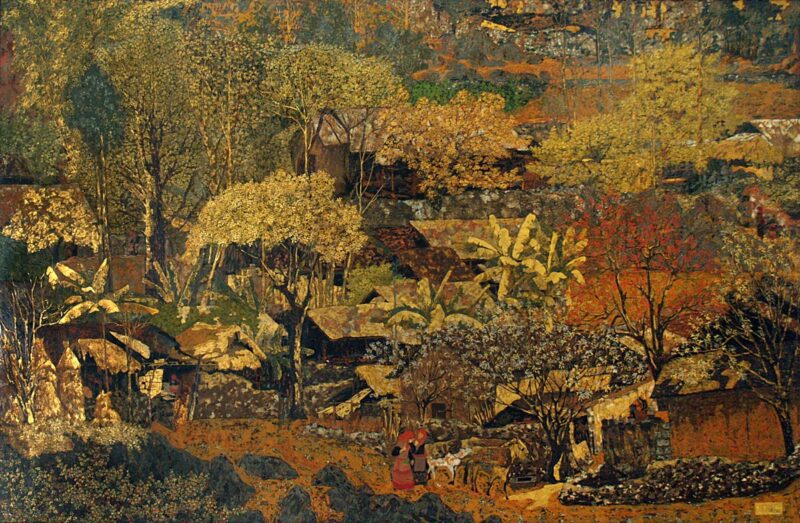 Lacquer painting "Spring on the highlands" by artist Phan Quang Tuan.
source: https://latoa.vn/nghe-thuat-son-mai---ve-dep-vinh-cuu-tren-tam-go-voc-post929.html


Comment (0)