Do you know how to present Word in work and study? Below is a detailed guide to help you learn this extremely useful trick!
 |
Instructions for installing WordShow 2.0 for simple Word presentations
This is a useful tool that allows you to present Word documents in full screen like PowerPoint. This add-in integrates with Microsoft Word, making it easy to turn your documents into engaging presentations. To get started, install the application into Word on your computer.
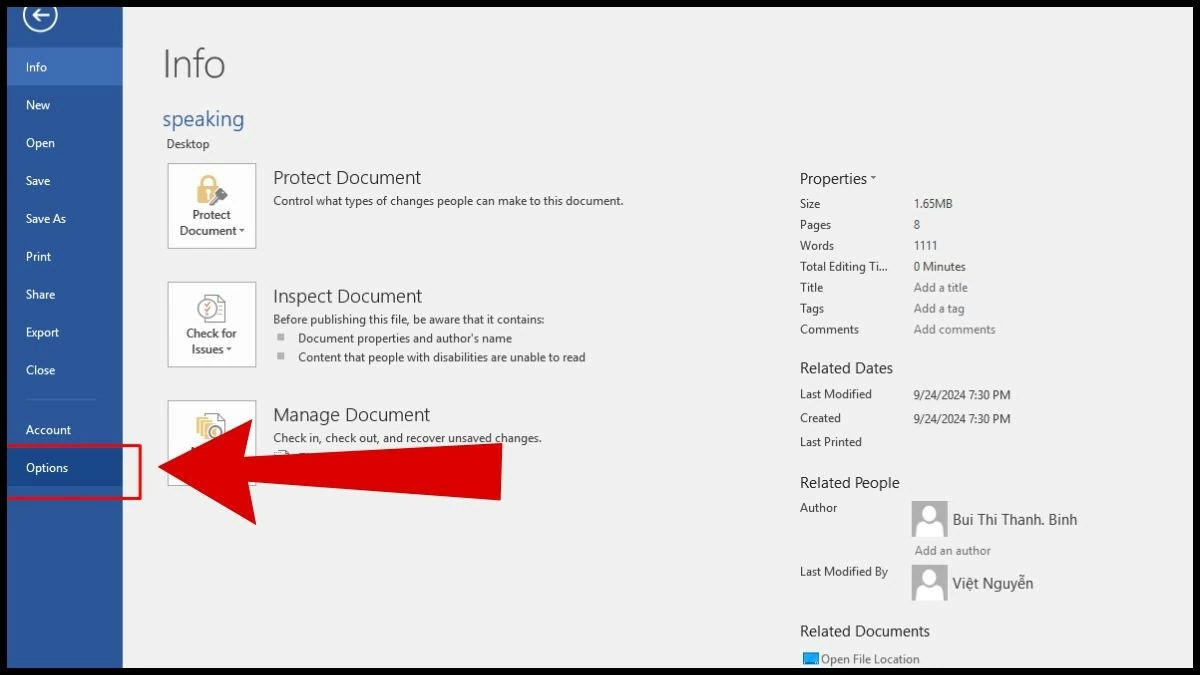
Step 1: After downloading and extracting successfully, open Microsoft Word, then select “Options”.
 |
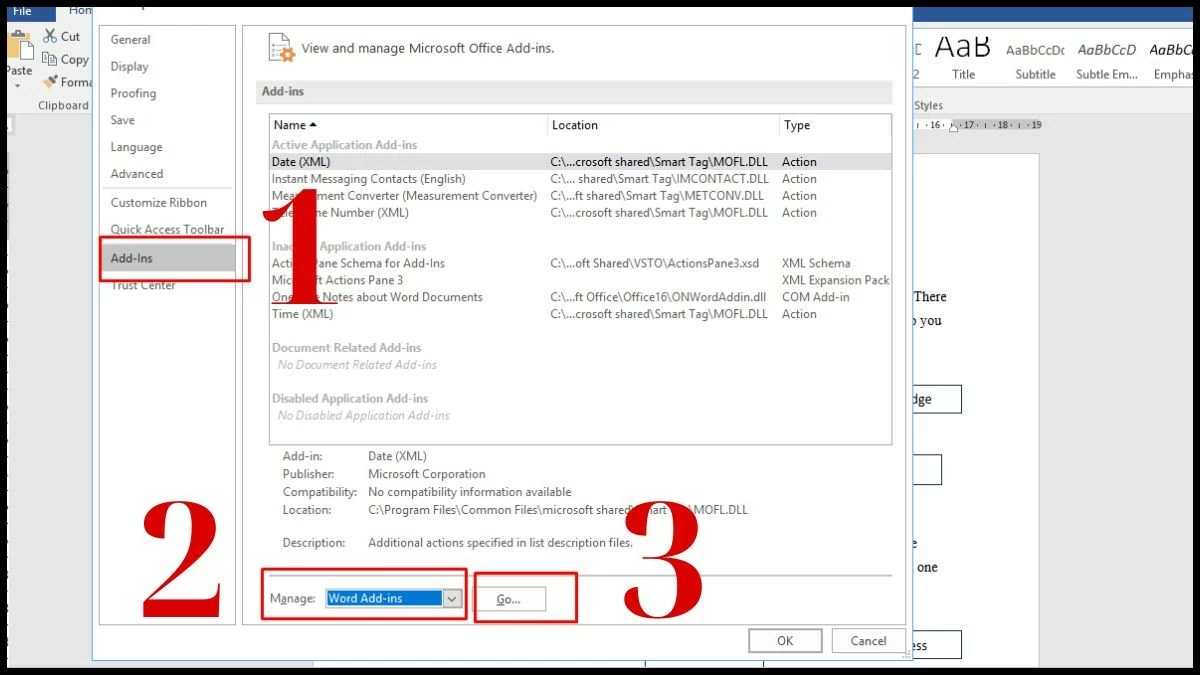
Step 2: In the menu, select “Add-ins,” then go to Manage, select “Word add-ins” and press “Go.”
 |
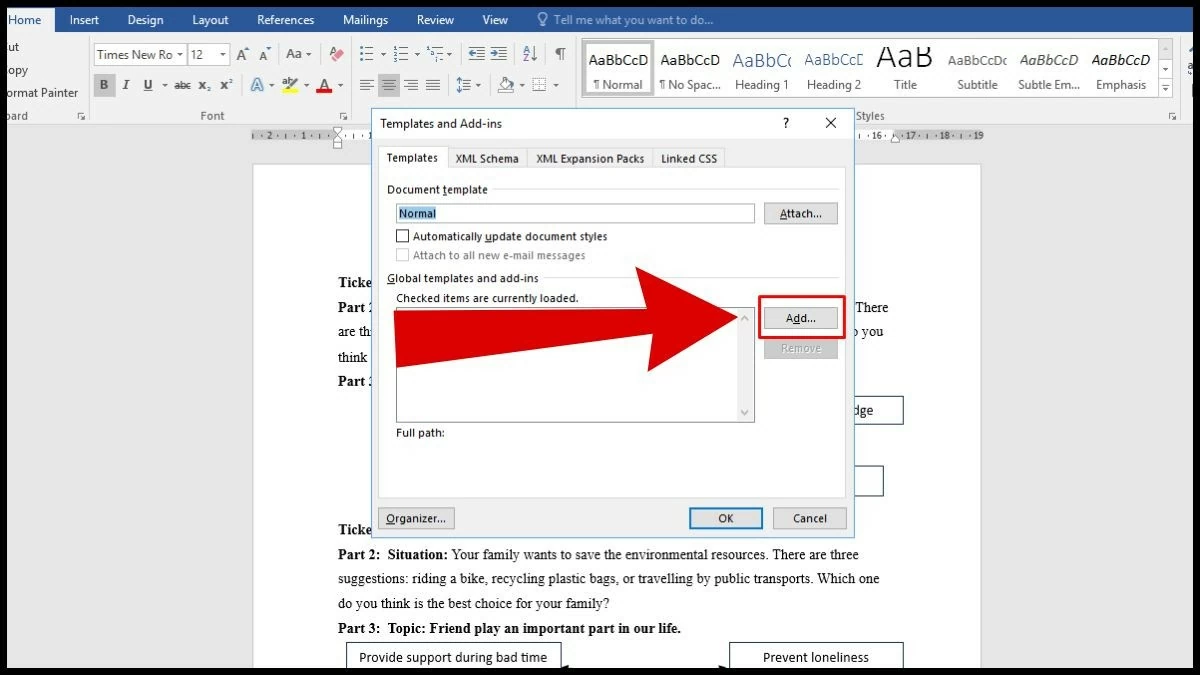
Step 3: When the screen appears, select “Add” to add the downloaded application.
 |
Step 4: Click on the file “WordShow 2.0” to select.
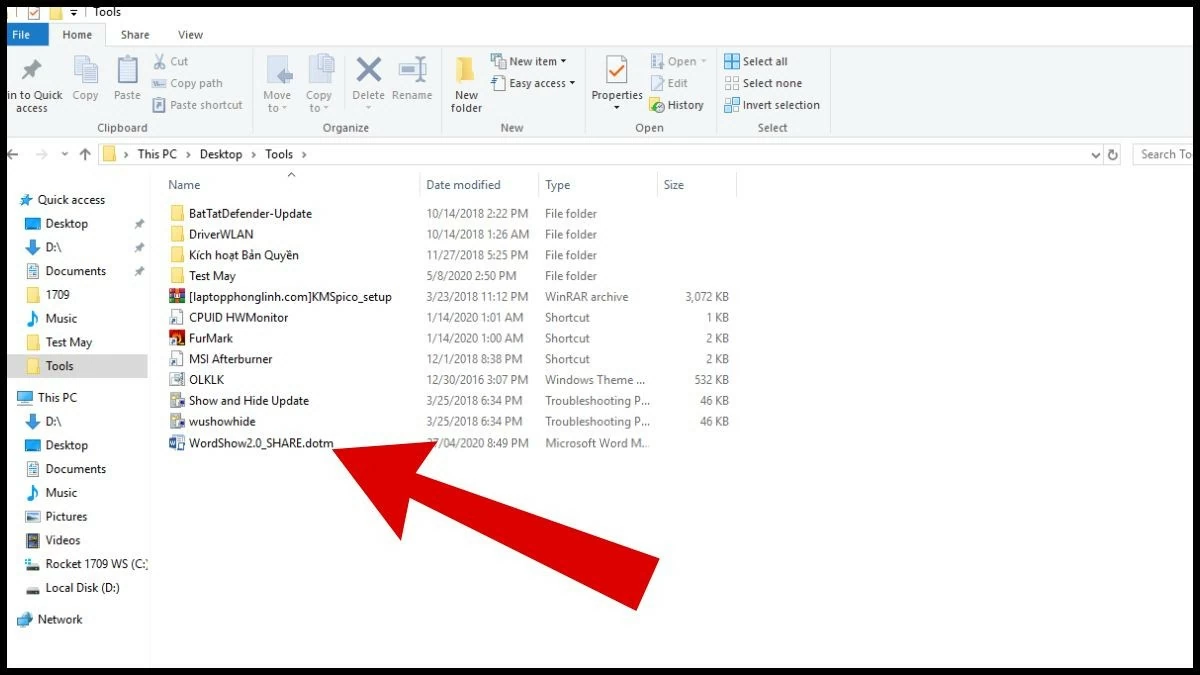 |
Step 5: When the Templates and Add-ins interface appears, click OK to complete the installation.
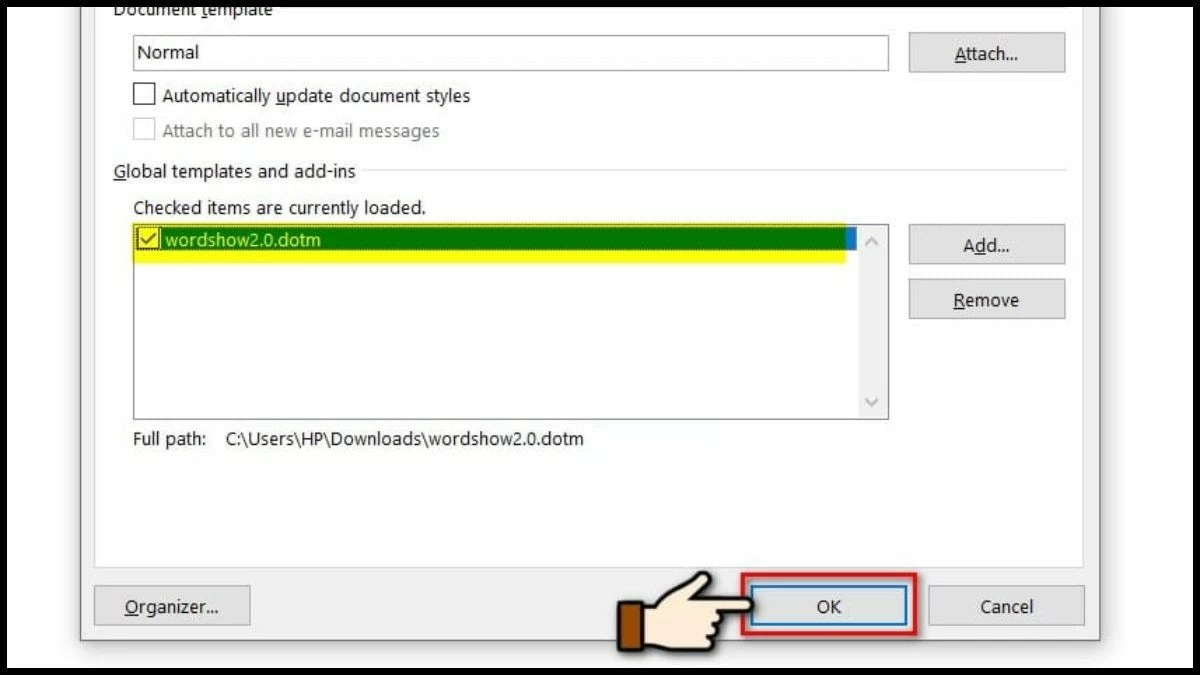 |
Instructions on how to present Word using WordShow 2.0 quickly
The application features the ability to hide or show content in order, along with flexible control options, making it convenient for educational or office presentations. Even with Word 2010, full-screen presentations are easy when done correctly.
Step 1: Click File in the top left corner.
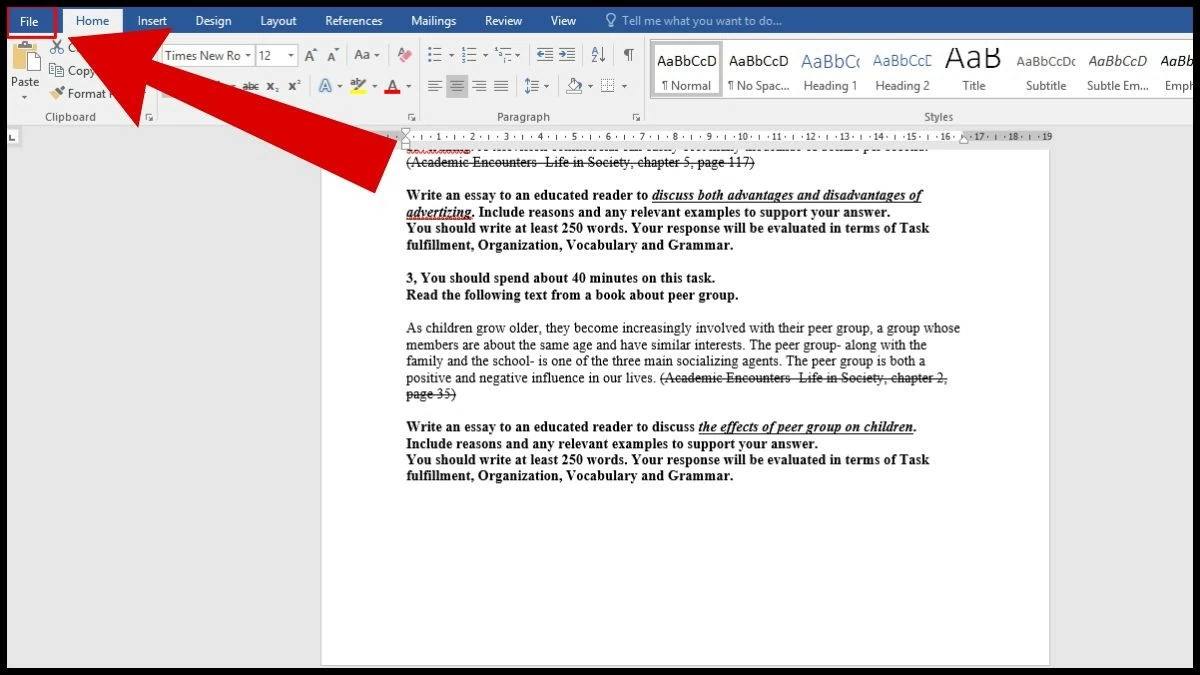 |
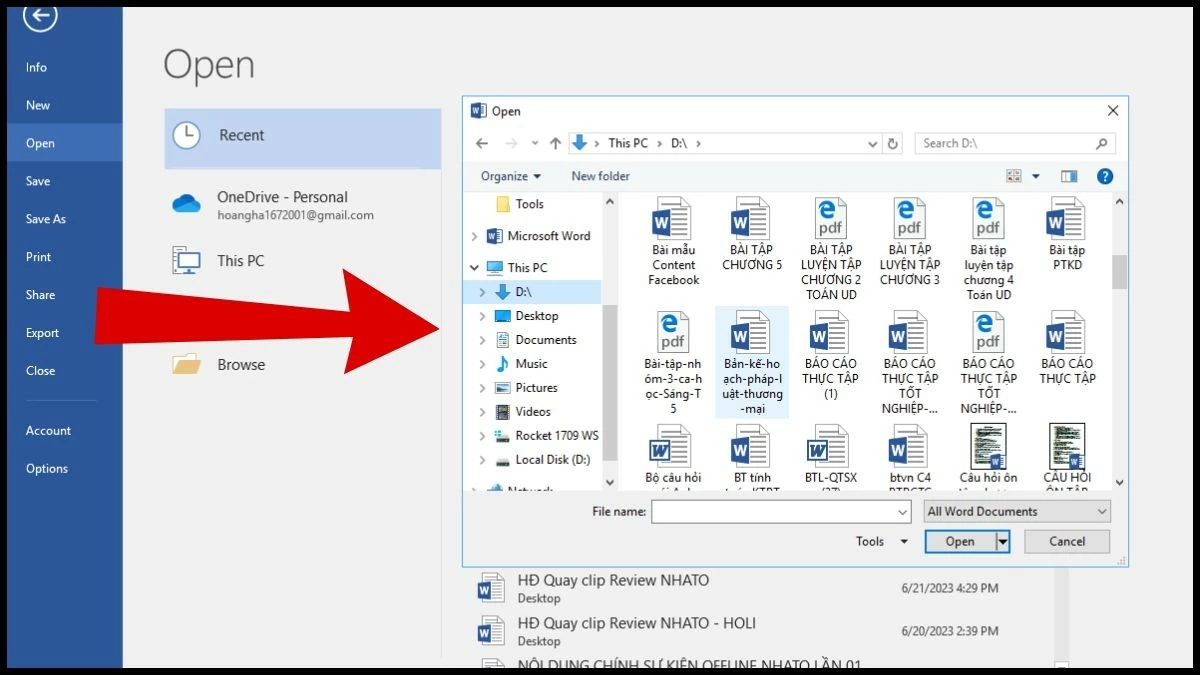
Step 2: In the menu, select Open , then click Browse .
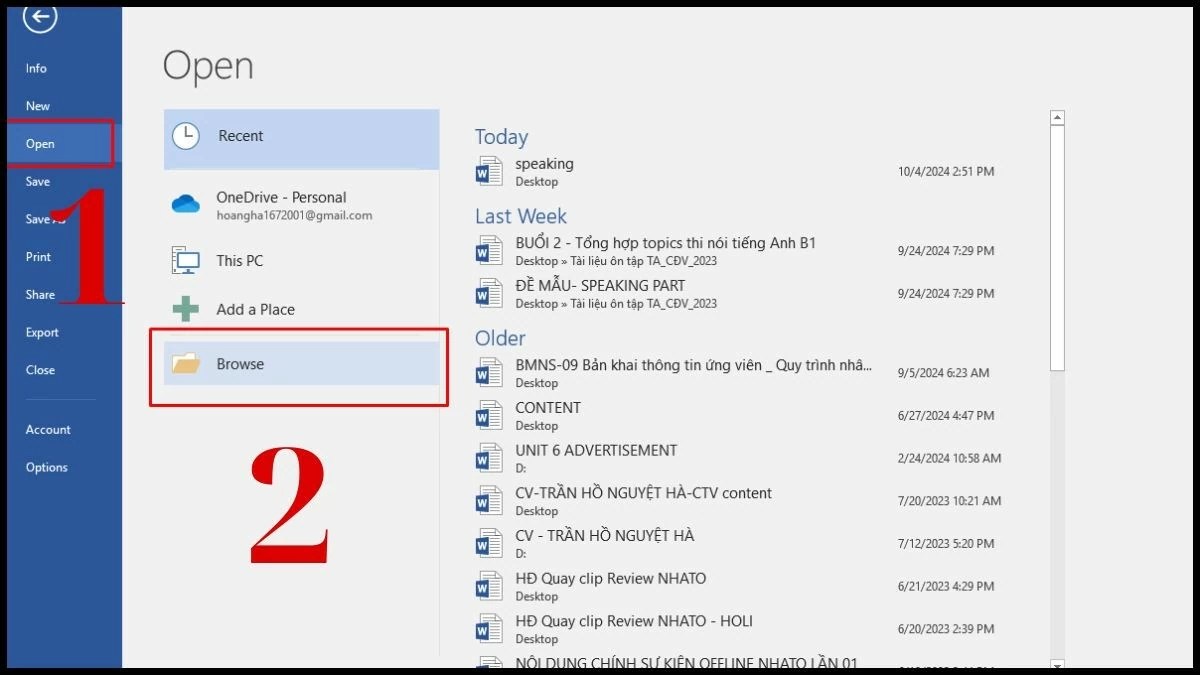 |
Step 3: Select and open the file you want to use for your presentation.
 |
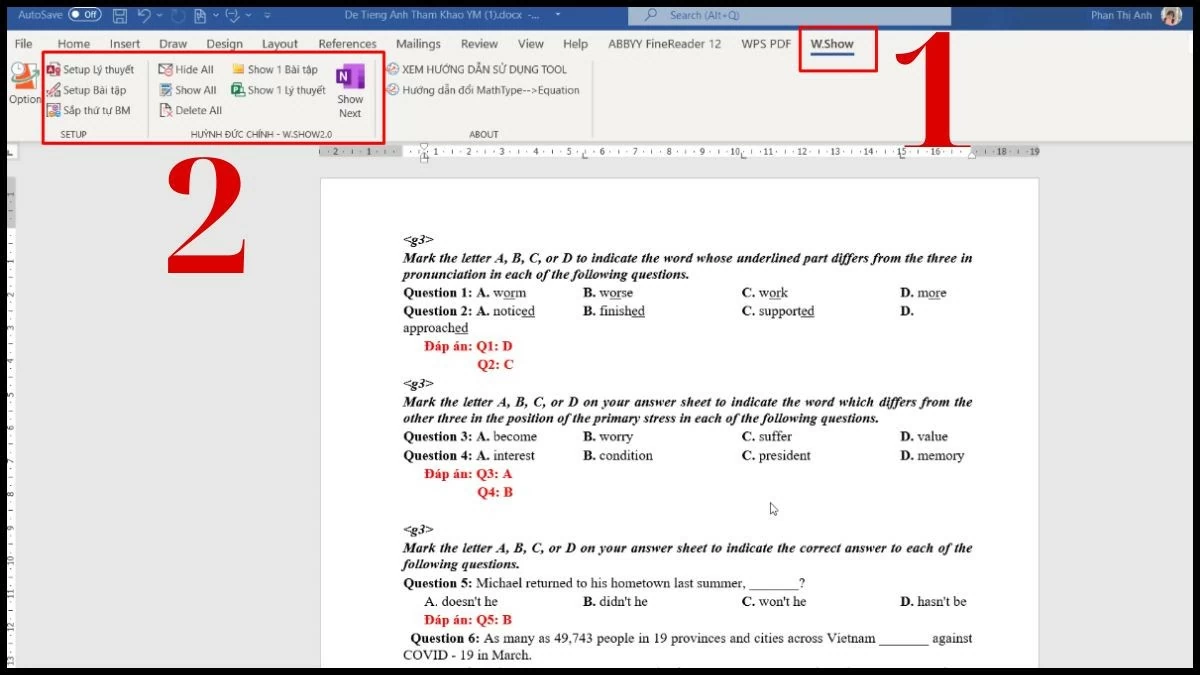
Step 4: Click “WordShow” on the toolbar to display the application’s features. Next, select the content you want to show, then select “Set up theory”, “Set up BM order” and “Show next” in turn.
 |
Above, we have guided you how to present Word in full screen. With this information, we hope you will easily present Word 2010 files in your work without difficulty. The article hopes to bring you a lot of useful knowledge about Word tricks.
Source


![[Photo] Da Nang: Hundreds of people join hands to clean up a vital tourist route after storm No. 13](https://vphoto.vietnam.vn/thumb/1200x675/vietnam/resource/IMAGE/2025/11/07/1762491638903_image-3-1353-jpg.webp)







Comment (0)